Home Upload Photo Upload Videos Write a Blog Analytics Messaging Streaming Create Adverts Creators Program
Bebuzee Afghanistan Bebuzee Albania Bebuzee Algeria Bebuzee Andorra Bebuzee Angola Bebuzee Antigua and Barbuda Bebuzee Argentina Bebuzee Armenia Bebuzee Australia Bebuzee Austria Bebuzee Azerbaijan Bebuzee Bahamas Bebuzee Bahrain Bebuzee Bangladesh Bebuzee Barbados Bebuzee Belarus Bebuzee Belgium Bebuzee Belize Bebuzee Benin Bebuzee Bhutan Bebuzee Bolivia Bebuzee Bosnia and Herzegovina Bebuzee Botswana Bebuzee Brazil Bebuzee Brunei Bebuzee Bulgaria Bebuzee Burkina Faso Bebuzee Burundi Bebuzee Cabo Verde Bebuzee Cambodia Bebuzee Cameroon Bebuzee Canada Bebuzee Central African Republic Bebuzee Chad Bebuzee Chile Bebuzee China Bebuzee Colombia Bebuzee Comoros Bebuzee Costa Rica Bebuzee Côte d'Ivoire Bebuzee Croatia Bebuzee Cuba Bebuzee Cyprus Bebuzee Czech Republic Bebuzee Democratic Republic of the Congo Bebuzee Denmark Bebuzee Djibouti Bebuzee Dominica Bebuzee Dominican Republic Bebuzee Ecuador Bebuzee Egypt Bebuzee El Salvador Bebuzee Equatorial Guinea Bebuzee Eritrea Bebuzee Estonia Bebuzee Eswatini Bebuzee Ethiopia Bebuzee Fiji Bebuzee Finland Bebuzee France Bebuzee Gabon Bebuzee Gambia Bebuzee Georgia Bebuzee Germany Bebuzee Ghana Bebuzee Greece Bebuzee Grenada Bebuzee Guatemala Bebuzee Guinea Bebuzee Guinea-Bissau Bebuzee Guyana Bebuzee Haiti Bebuzee Honduras Bebuzee Hong Kong Bebuzee Hungary Bebuzee Iceland Bebuzee India Bebuzee Indonesia Bebuzee Iran Bebuzee Iraq Bebuzee Ireland Bebuzee Israel Bebuzee Italy Bebuzee Jamaica Bebuzee Japan Bebuzee Jordan Bebuzee Kazakhstan Bebuzee Kenya Bebuzee Kiribati Bebuzee Kuwait Bebuzee Kyrgyzstan Bebuzee Laos Bebuzee Latvia Bebuzee Lebanon Bebuzee Lesotho Bebuzee Liberia Bebuzee Libya Bebuzee Liechtenstein Bebuzee Lithuania Bebuzee Luxembourg Bebuzee Madagascar Bebuzee Malawi Bebuzee Malaysia Bebuzee Maldives Bebuzee Mali Bebuzee Malta Bebuzee Marshall Islands Bebuzee Mauritania Bebuzee Mauritius Bebuzee Mexico Bebuzee Micronesia Bebuzee Moldova Bebuzee Monaco Bebuzee Mongolia Bebuzee Montenegro Bebuzee Morocco Bebuzee Mozambique Bebuzee Myanmar Bebuzee Namibia Bebuzee Nauru Bebuzee Nepal Bebuzee Netherlands Bebuzee New Zealand Bebuzee Nicaragua Bebuzee Niger Bebuzee Nigeria Bebuzee North Korea Bebuzee North Macedonia Bebuzee Norway Bebuzee Oman Bebuzee Pakistan Bebuzee Palau Bebuzee Panama Bebuzee Papua New Guinea Bebuzee Paraguay Bebuzee Peru Bebuzee Philippines Bebuzee Poland Bebuzee Portugal Bebuzee Qatar Bebuzee Republic of the Congo Bebuzee Romania Bebuzee Russia Bebuzee Rwanda Bebuzee Saint Kitts and Nevis Bebuzee Saint Lucia Bebuzee Saint Vincent and the Grenadines Bebuzee Samoa Bebuzee San Marino Bebuzee São Tomé and Príncipe Bebuzee Saudi Arabia Bebuzee Senegal Bebuzee Serbia Bebuzee Seychelles Bebuzee Sierra Leone Bebuzee Singapore Bebuzee Slovakia Bebuzee Slovenia Bebuzee Solomon Islands Bebuzee Somalia Bebuzee South Africa Bebuzee South Korea Bebuzee South Sudan Bebuzee Spain Bebuzee Sri Lanka Bebuzee Sudan Bebuzee Suriname Bebuzee Sweden Bebuzee Switzerland Bebuzee Syria Bebuzee Taiwan Bebuzee Tajikistan Bebuzee Tanzania Bebuzee Thailand Bebuzee Timor-Leste Bebuzee Togo Bebuzee Tonga Bebuzee Trinidad and Tobago Bebuzee Tunisia Bebuzee Turkey Bebuzee Turkmenistan Bebuzee Tuvalu Bebuzee Uganda Bebuzee Ukraine Bebuzee United Arab Emirates Bebuzee United Kingdom Bebuzee Uruguay Bebuzee Uzbekistan Bebuzee Vanuatu Bebuzee Venezuela Bebuzee Vietnam Bebuzee World Wide Bebuzee Yemen Bebuzee Zambia Bebuzee Zimbabwe
Blog Image

Easy Step-By-Step Tutorial for the Bat Wing Eyeliner Look

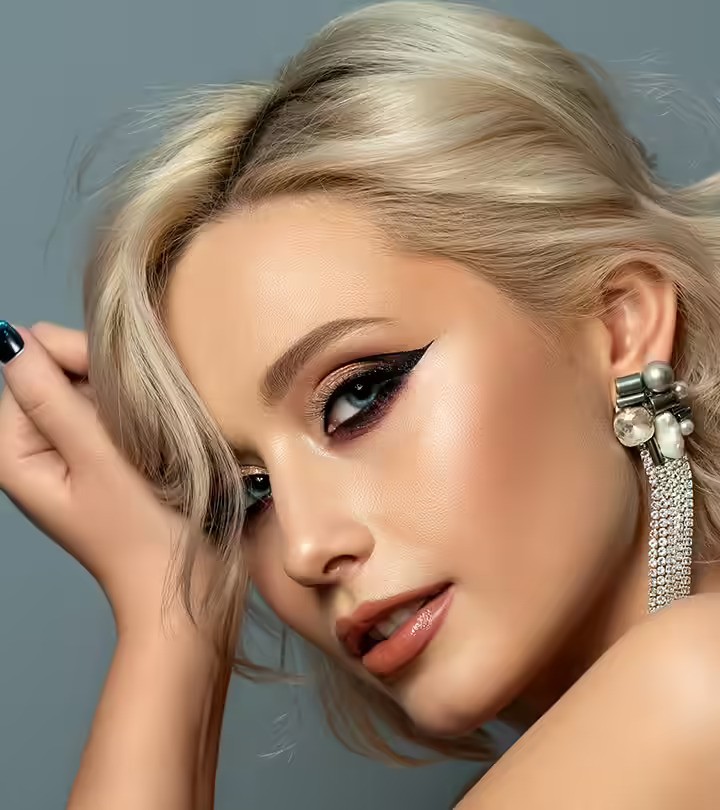
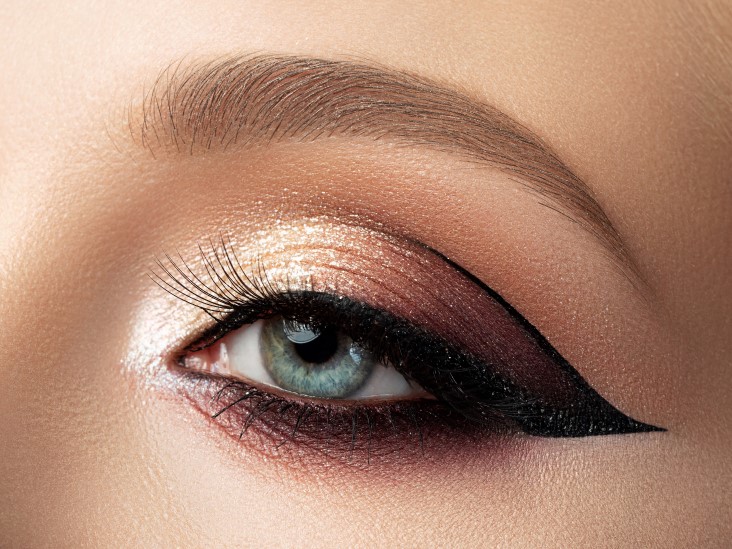
The bat wing eyeliner look is a bold and dramatic style that can elevate any makeup look, making your eyes appear larger and more defined. This striking design features elongated wings that resemble bat wings, adding an edgy flair to your appearance. Whether you're preparing for a night out or simply want to experiment with your makeup, this tutorial will guide you through achieving the perfect bat wing eyeliner in just six easy steps.

Step 1: Gather Your Tools

Before you begin, make sure you have all the necessary tools at hand. You will need:

- Liquid eyeliner or gel eyeliner with a fine brush

- Eyeliner pencil (optional for outlining)

- Makeup remover or cotton swabs for corrections

- Eyeshadow primer (optional)

- Eyeshadow (optional for a smoky effect)

- Mascara

Step 2: Prep Your Eyes

Start with a clean canvas. If you have oily eyelids, apply an eyeshadow primer to help your eyeliner stay in place throughout the day. This step is optional but recommended for a longer-lasting look. If you want to add some depth to your eyes, you can apply a neutral eyeshadow to your eyelids as a base.

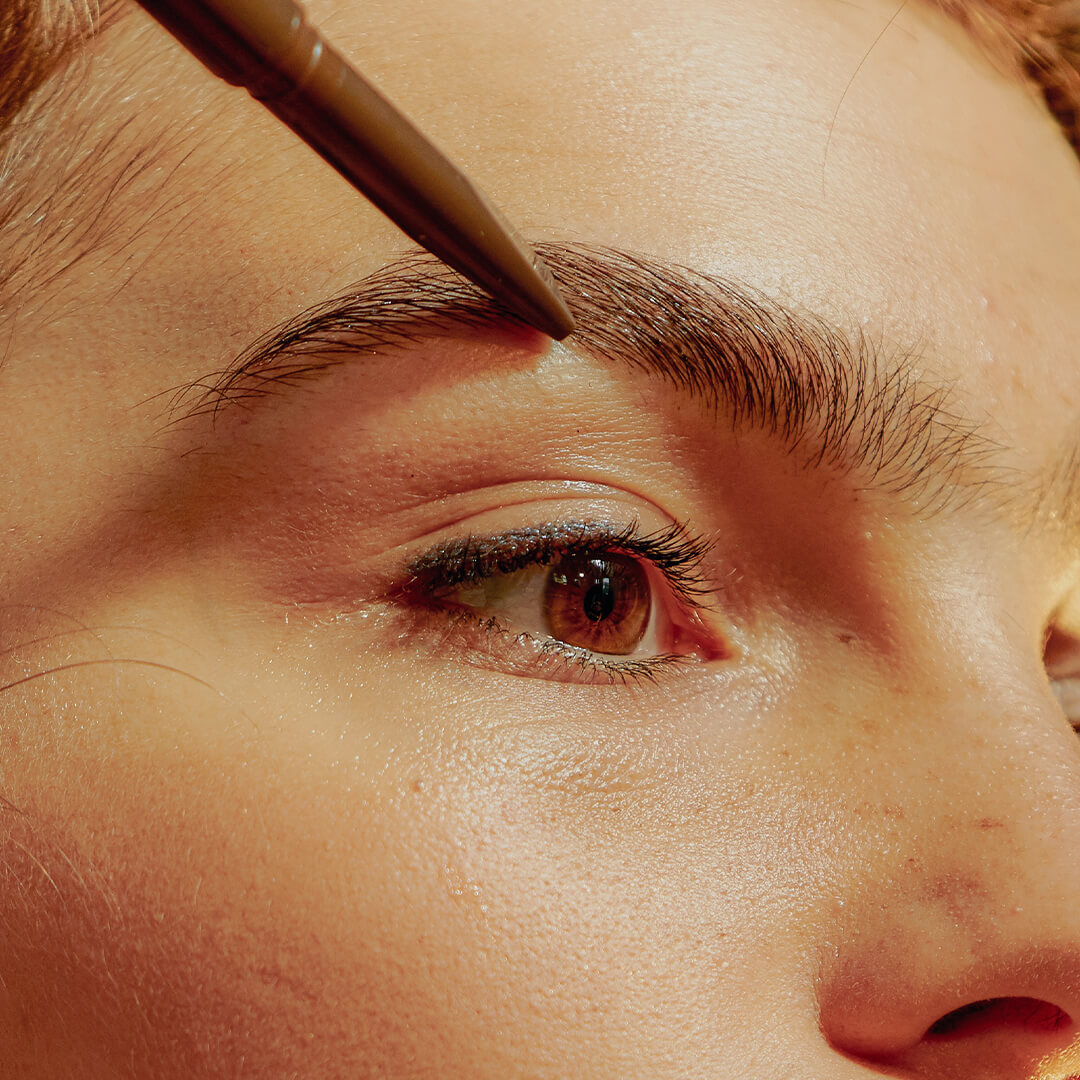
Step 3: Outline the Wing

Using an eyeliner pencil, lightly outline the shape of your bat wing. Start from the outer corner of your eye and extend the line upwards at a slight angle. The length and angle of the wing can be adjusted based on your preference. This step serves as a guide for your liquid or gel eyeliner application, making it easier to achieve symmetry.

7 Ways to Get the Perfect Wing - Cosmetology School & Beauty ...

Step 4: Apply the Eyeliner

Now it’s time to apply the eyeliner. If you’re using liquid eyeliner, hold the applicator at a slight angle and start from the inner corner of your eye, drawing a thin line along your lash line. As you reach the outer corner, follow the outline you created in the previous step to extend the line into a wing.

For a gel eyeliner, use a fine brush to achieve precision. Start with a thin line and gradually build up the thickness as desired. Remember, it’s easier to add more product than to remove it, so start small.

Step 5: Perfect the Wing

Once you have the basic shape of your bat wing, it’s time to perfect it. If the wing looks uneven, use a cotton swab dipped in makeup remover to clean up any mistakes and sharpen the edges. You can also use the cotton swab to create a more dramatic point at the tip of the wing.

For added drama, you can thicken the eyeliner along the lash line and wing, ensuring that the transition from the lash line to the wing is smooth.

Step 6: Finish with Mascara

To complete the bat wing eyeliner look, apply a few coats of mascara to your lashes. This will help to open up your eyes and draw attention to the winged eyeliner. If you want to go the extra mile, consider adding false lashes for a more dramatic effect.

Final Touches

Once you’ve finished applying mascara, take a step back and assess your look. If you feel like your eyeliner needs a little more definition, you can add a touch of eyeshadow along the lower lash line or in the outer corner of your eyes to create a smoky effect.

The bat wing eyeliner look is a stunning way to enhance your eyes and add a touch of drama to your makeup routine. With these six easy steps, you can master this bold style in no time. Remember, practice makes perfect, so don’t be discouraged if it takes a few tries to achieve the desired look. Embrace your creativity, and have fun experimenting with different wing shapes and sizes. Whether you’re going for a subtle look or a bold statement, the bat wing eyeliner is sure to turn heads!

Previous Post

Flawless Skin: 5 Best Facial Treatment Spas in Bangkok

Next Post

7 Easy Ways to Get Rid of Dry Skin on Your Face

Comments