Golden Hour Photography: A Complete Guide (+10 Tips)
-
 Loading...
 - Jake Martin
- 08 Jul 2022
- 106 Views
- 0 Like
- 0 Comment
Golden hour is a special time for photographers. The sun is low in the sky, and the light looks soft, warm, and absolutely magical. By combining proper photographic technique with golden hour lighting, you’re practically guaranteed to capture stunning images – which is what this article is all about.
Below, I’m going to share everything you need to know about golden hour photography. I’ll answer all your burning questions, and I’ll explain how to improve your golden hour images with a few expert tips and techniques.
Let’s dive right in!
What is the golden hour in photography?
The golden hour refers to (roughly) the first hour after sunrise and the last hour before sunset. It’s a time that’s great for photography; hence, the golden hour is also referred to as the magic hour.
During the golden hour, the sun hits the world at a lower angle – and because the light must travel a greater distance to reach the earth, it looks softer, more flattering, and redder. (Compare this to sunny midday lighting, which beams down from directly overhead to produce hard, generally unflattering illumination.)
Here’s a typical golden hour photo:

Notice the beautiful yellow hues and unbelievably flattering light? That’s what golden hour offers for photographers.
When is the golden hour?
While the standard definition of the golden hour – see above! – emphasizes the hour or two before sunset and after sunrise, the golden hour actually fluctuates over the year, and its length depends on your geographical location.
If you live near the equator, the golden hour tends to last one or two hours, and the time won’t change too much as you go from winter to summer and back. But if you live closer to the North or South Pole, you’ll notice a massive change in the golden hour timing, and the golden hours often last far longer.
Really, if you’re serious about taking advantage of beautiful golden hour light, I’d just recommend paying careful attention to the sun for a few days. Ask yourself: When does it rise? When does it set? When does the light start to get warm and soft in the evening? And when does the light start to get hard in the morning? While you can calculate exact golden hour times using astronomical charts, it’s often best to simply observe the light; pretty soon, you’ll be very attuned to the sun’s changes, and you’ll know when you can (and can’t) expect magic-hour lighting.
Why is the golden hour so special?
I’ve already emphasized the low, soft, warm light produced by a magic-hour sun – but what makes it so great for photography?
Well, generally speaking, soft light is a photographer’s best friend. It doesn’t create harsh shadows and it tends to decrease the dynamic range of a scene, so the resulting images don’t feature dark shadows or bright highlights.
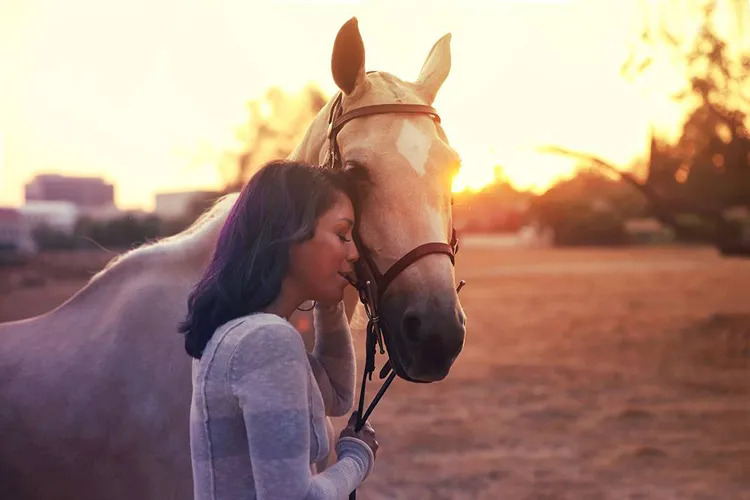
Plus, the warm color temperature produced by the golden hours can look beautiful and flattering, as shown in this next photo:

And a low sun hits the subject more directly, so there are fewer shadows produced under subjects’ eyes, noses, and chins.
That said, the golden hour isn’t great for all types of photography. While portrait photographers, wildlife photographers, and landscape photographers love magic-hour light, street photographers generally prefer to shoot around midday, when the hard light of the sun produces lots of crunchy contrast and shadows. And many macro photographers prefer to shoot when the sky is overcast; that way, they can capture saturated colors and lots of detail.
So don’t feel like you must work during the golden hour. Just know that it’s a great way to enhance many types of photos. Got it?
The golden hours vs the blue hour
If you’re just diving into photographic lighting, you may have come across the term “blue hour” in addition to “golden hour.” So what’s the difference?
While the golden hour is the hour after sunrise and the hour before sunset, the blue hour is the opposite: It’s the hour before sunrise and the hour after sunset.
In other words, the blue hour refers to the time when the sun is just below the horizon. During the blue hour, the sky turns beautiful cool colors – blues and purples – which look great in landscape and even portrait photos. Unfortunately, the lack of strong light during the blue hour can cause technical problems, but if you choose the right gear, set your ISO carefully, and/or use a tripod, your photos will be spectacular.
Five key lighting techniques for golden hour photography
The golden hour offers five powerful lighting techniques:
Front light
Front lighting is when your subject faces directly into the sun:

During the golden hours, front light offers a warm, flattering effect that’s perfect for photographing people, wildlife, and birds. (And because the sun isn’t too bright, portrait subjects won’t need to squint!)
Just point your shadow at your subject, let the sun fall over your shoulder, and have fun shooting.
Backlight
Backlight occurs when the sun is behind your subject. And during the golden hours, backlight creates a soft, warm, hazy, glowing effect, like this:

Golden hour backlight works great, but you need to be careful; it’s easy to accidentally underexpose your subject and end up with a partial silhouette. To avoid this problem, make sure to meter off your subject, not the background.
Rim light
Rim lighting is when the sun creates a halo around your subject:

(This halo will be especially prevalent when your subject is positioned against a dark background.)
While you can create rim lighting with backlight, the sun doesn’t need to sit directly behind your subject. The background just needs to be (relatively) dark, and the sun just needs to come from (roughly) a back angle. You’ll have to move around until you find a sweet spot, though getting down low is a good start. Read More…


