Grandma’s Easy Homemade Italian Bread Recipe
-
 Loading...
 - Atlas Stavros
- 21 Mar 2023
- 68 Views
- 0 Like
- 0 Comment
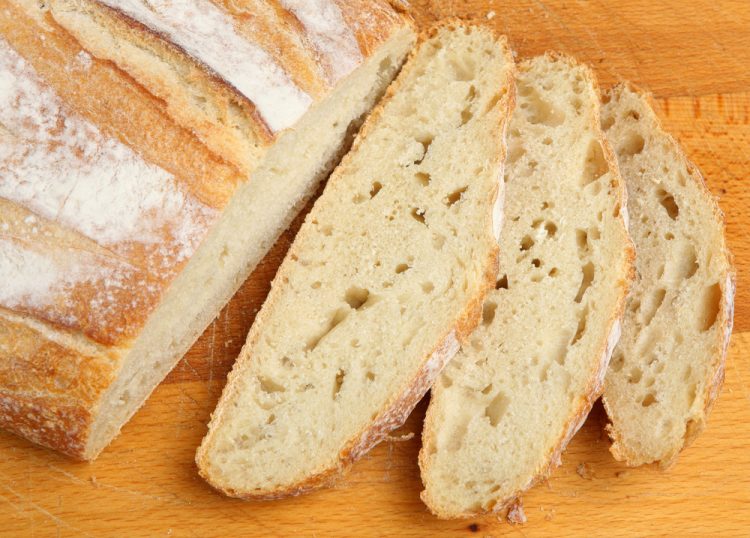
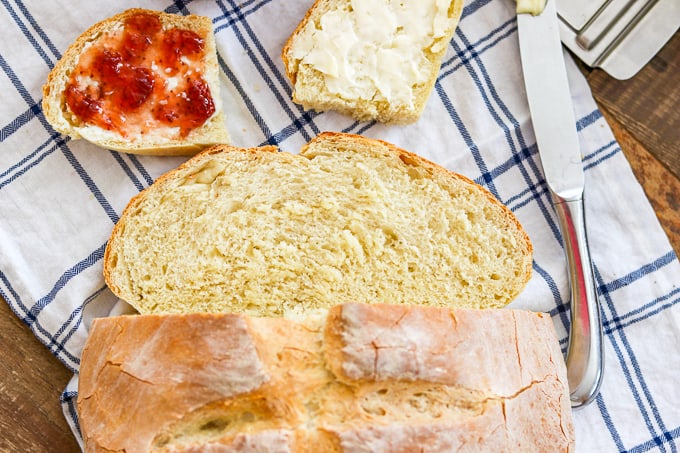
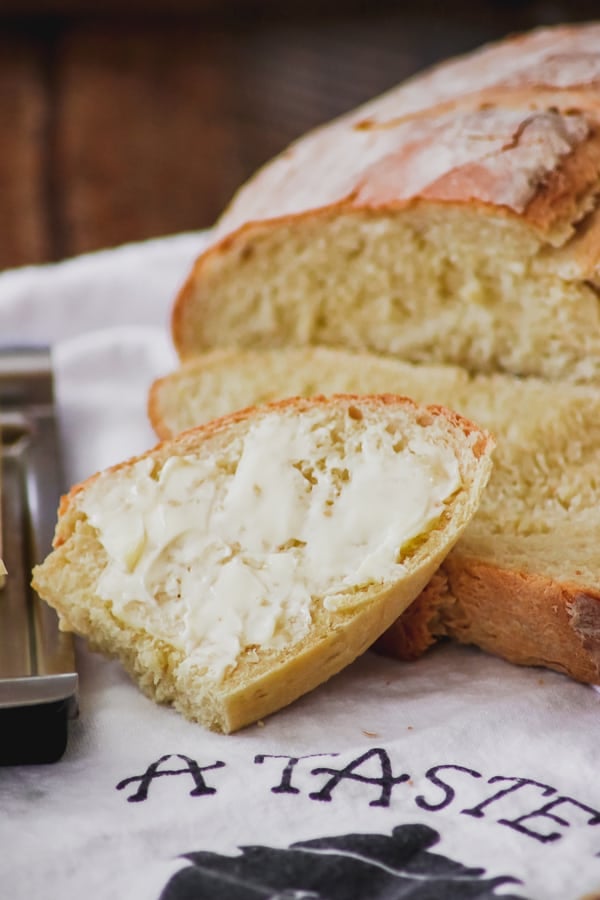
My Grandma’s Italian Bread is an easy homemade bread recipe made with flour, water, yeast, salt, some sugar, and shortening. It’s got the perfect crust, crunchy with a slight chewiness and is so incredibly soft and delightful on the inside. It’s also a delicious way to sop up the leftover sauce when paired with my mother’s lasagna!
This bread is great out of the oven slathered with butter, as a side with your favorite pasta dinner, used for your panini sandwich at lunch or even toasted for breakfast!
Italian Bread
I grew up eating this bread at my grandparent’s house growing up so often that I honestly don’t remember a time when she didn’t have a loaf in her kitchen.
She made two loaves just about every week. We ate it with her Chicken Cacciatore, Manhattan Clam Chowder and with just about every dinner.
However, my most favorite way of eating it was right out of the oven completely covered in butter.
You know those dishes that instantly transport you back in time? The ones you enjoyed so much over so many years that no matter how long it’s been, one taste sends you right back to childhood?
This Italian Bread is that for me. I remember barely being able to wait for it to cool before stealing a slice and slathering it all over with butter to eat right at the kitchen counter.
Tips for making Grandma’s Italian Bread Recipe –
Be patient!
This recipe is super easy to make, but you must have patience. There are times when the dough has to both rest and rise. It can be a struggle, but it’s well worth the wait, believe me!
- Divide the 3 cups of flour into a separate bowl. That way, you won’t have to take the time to remeasure when you’re adding it to the yeast mixture.
- When I can’t find a warm enough spot in my house for the dough to rise, I turn my oven to bake at 170°. I do it when I mix and knead the dough then turn it off. Then allow it to rise in the oven. Warm (but not hot) temperatures help the dough rise.
- I’ve had success both baking it on the pizza stone, as well as on a cookie sheet upside down. Both work, I think I just prefer the way it turns out on the cookie sheet best. (For the life of me, I cannot remember what Grandma used. Weird, isn’t it?)
- Listen for that hollow sound when you tap on the bottom to know that the loaves are completely baked. This is key. There have been many a time that I’ve been impatient to bite into a slice that I’ve taken it out too early. The middle needs to be completely done and the hollow sound helps you identify its doneness without busting into the loaf.
- If you don’t devour both loaves in the first week (like I often do), the second loaf can be frozen. Wrap it up tight in plastic wrap once it’s completely cooled and then again in aluminum foil. Then freeze for no more than three weeks. Read More…