How to Make a Fake Tile Lavender Tray
-
 Loading...
 - Marcelle Simon
- 29 Aug 2022
- 71 Views
- 0 Like
- 0 Comment
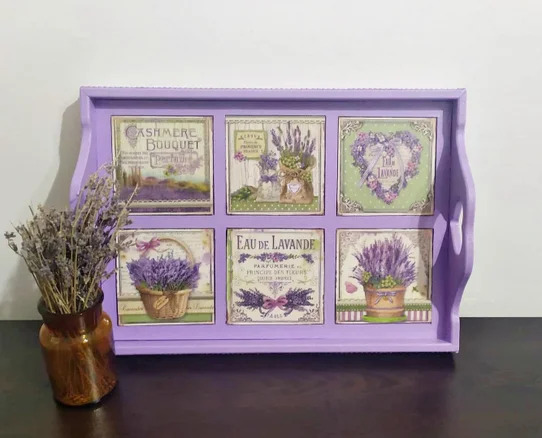
It's Summer and here in my country the air is filled with the calming scent of lavender.I wanted to create something inspired by that and ended up incorporating the beautiful plant itself into this project.My favorite color also happens to be purple so this tray is now my favorite decor piece in my home.
Let's get started!
Supplies
MDF serving tray
Scrapbooking paper
Craft glue
Acrylic paint
Brushes
Scissors
X-acto knife
Craft mat
Glossy varnish
Chipboard
Foam brush
Ruler
Bone folder
Mod Podge dimensional magic
Purple lace
Step 1: Cut the Chipboard

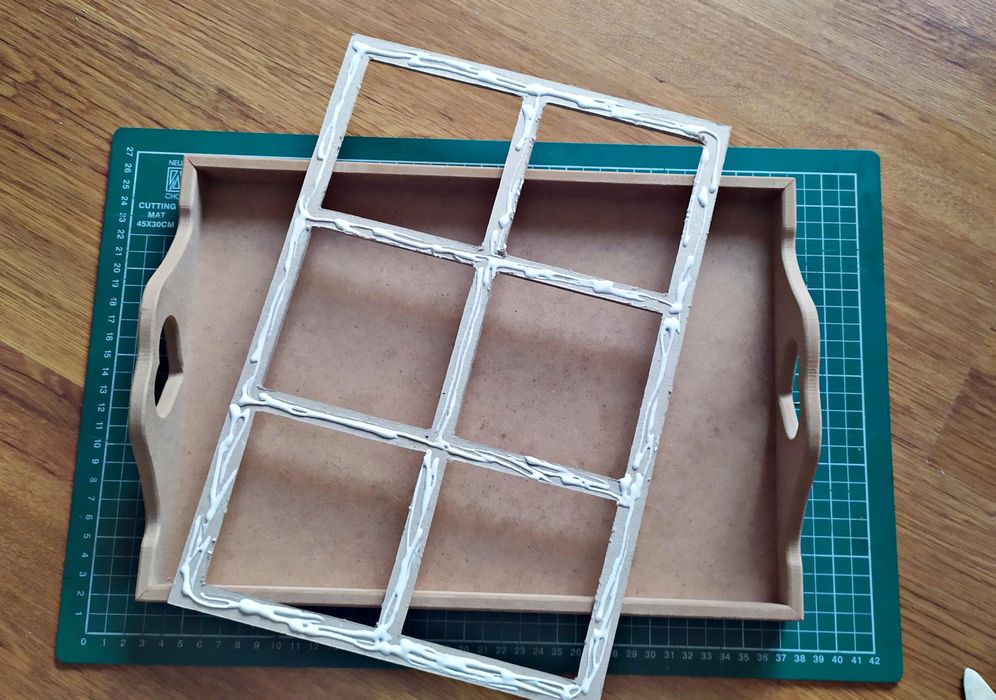
I have had this sheet of designer paper for a long time.I thought the squares were perfect to try to make fake tiles.Since the base of the MDF tray was way too thin I decided it would be best to insert some chipboard and built everything around that.
Start out by measuring the inner dimensions of the tray.Next,cut a rectangle piece from the chipboard with those dimensions.If needed trim some excess and place the chipboard inside the tray.
Step 2: Tile Bases

Cut the lavender designs and place them onto the chipboard,equally spaced apart.Once you are happy with the arrangement,trace each square using a pencil.Remove the designer paper and start cutting each square.
To make everything easier number each square.Use a ruler and an X-acto knife to cut the bases for our tiles.
Once cut,trim the sides of the chipboard squares so that they easily fit back into the tray.
Step 3: Making the Tiles

Apply a small amount of craft PVA glue on the chipboard squares.Next,place the lavender designer paper and gently press.Use a bone folder and run it over the paper to make everything smooth.Clean up any excess glue and trim any excess paper from the sides.Repeat this step with each of the six designs.
To imitate the shininess of real tiles apply some Mod Podge Dimensional Magic - this will make the squares shine and will give them some dimension.Let them dry completely before working with them again.
Step 4: Puple Paint
Using more PVA glue,attach the chipboard onto the tray itself.Run a bone folder through it to smooth everything out.Let it dry before you move on to the painting step.
To create the shade of purple I like I used a darker purple and mixed it with white.This way I got a lavender purple shade.When mixing paint make sure the amount is enough to cover the object you are painting.It's better to have leftover paint than trying to get that perfect shade of purple again.
Once you are happy with your color,begin painting.Use a foam brush or a regular brush.I applied two coats of paint to make sure everything is opaque.Let the paint dry before moving on with the next step. Read More...