Image prep for Retouching
-
 Loading...
 - Fiona Cullen
- 06 Oct 2022
- 68 Views
- 0 Like
- 0 Comment
Sometimes fixes can be very simple – here we explain two of the most basic and effective processes you’re likely to need before you start retouching an image.
Resizing
While you can often copy prints at their original size and an appropriate resolution, virtually all of your scanned slides or negatives will need to be resized.
It’s usually wise to match the resolution to the end usage you have planned because if you enlarge the image after editing you risk making your adjustments obvious. Different usages have different resolution requirements, which we outlined in the previous chapter.
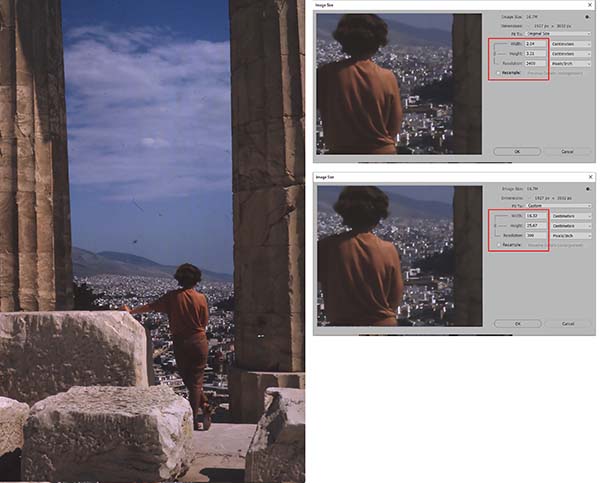
As explained, when originals are small (eg: 35mm film frames) and you want to make prints from them you should scan at much higher resolutions. If you’ve scanned a 36 x 24 mm film frame at 2400 ppi to make A4 sized prints it needs to be resized to fit on the paper.
While most printer drivers can adapt an image file to fit onto a specified sheet of paper, it’s better to resize before printing using the settings in your favourite image editor. This gives you a lot more control over the process and enables you to produce several versions of the image, each with its size and resolution matched to a different destination; one for emails, another for printing and another for including in a slideshow that will be viewed on a TV screen, for example.
Resizing is provided in even the most basic editors and it’s very easy to accomplish. As an example we’ve chosen a 35mm slide taken in Athens in the 1960s and scanned at 2400 dpi. Resizing will make this image usable for printing or sharing online. Read More...