Turbocharge your wedding edits with the help of AI
-
 Loading...
 - Ella Jones
- 30 May 2022
- 288 Views
- 0 Like
- 0 Comment
A typical wedding day photoshoot can result in thousands of images. After the photographer has spent hours actively capturing the event, hours of culling and editing still loom ahead of them. In an earlier Smarter Image column, I offered an overview of apps designed to sort and edit your photos faster. For this installment, I want to look at the editing side and how AI tools can shave off some of that time.
Consider this situation: You’ve done your initial sort and now you have a series of photos of the bride. They were made in the same location, but the bride strikes different poses and the framing is slightly different from shot to shot. They could all use some editing, and because they’re all similar they’d get the same edits.
This is where automation comes in. In many apps, you can apply edits to one of the images and then copy or sync those edits to the rest. However, that typically works globally, adjusting the tone and color evenly to each full image. What if the overall photo is fine but you want to increase the exposure on just the bride to make her stand out against the backdrop? Well, then you’re back to editing each image individually.
But not necessarily. The advantage of AI-assisted processing is that the software identifies objects within a scene. When the software can pick out the bride and apply edits only to her—even if she moves within the frame—it can save a lot of time and effort.
For this task I’m looking specifically at three apps: Adobe Photoshop, Adobe Lightroom Classic (the same features appear in the cloud-based Lightroom desktop app), and Skylum Luminar Neo. These apps can identify people and make selective edits on them, and batch-apply those edits to other images.
First, let’s look at the example photos I’m working with to identify what they need. Seattle-based photographer Carol Harrold of Carol Harrold Photography graciously allowed me to use a series of photos from a recent wedding shoot. These are Nikon .NEF Raw images from straight out of the camera.
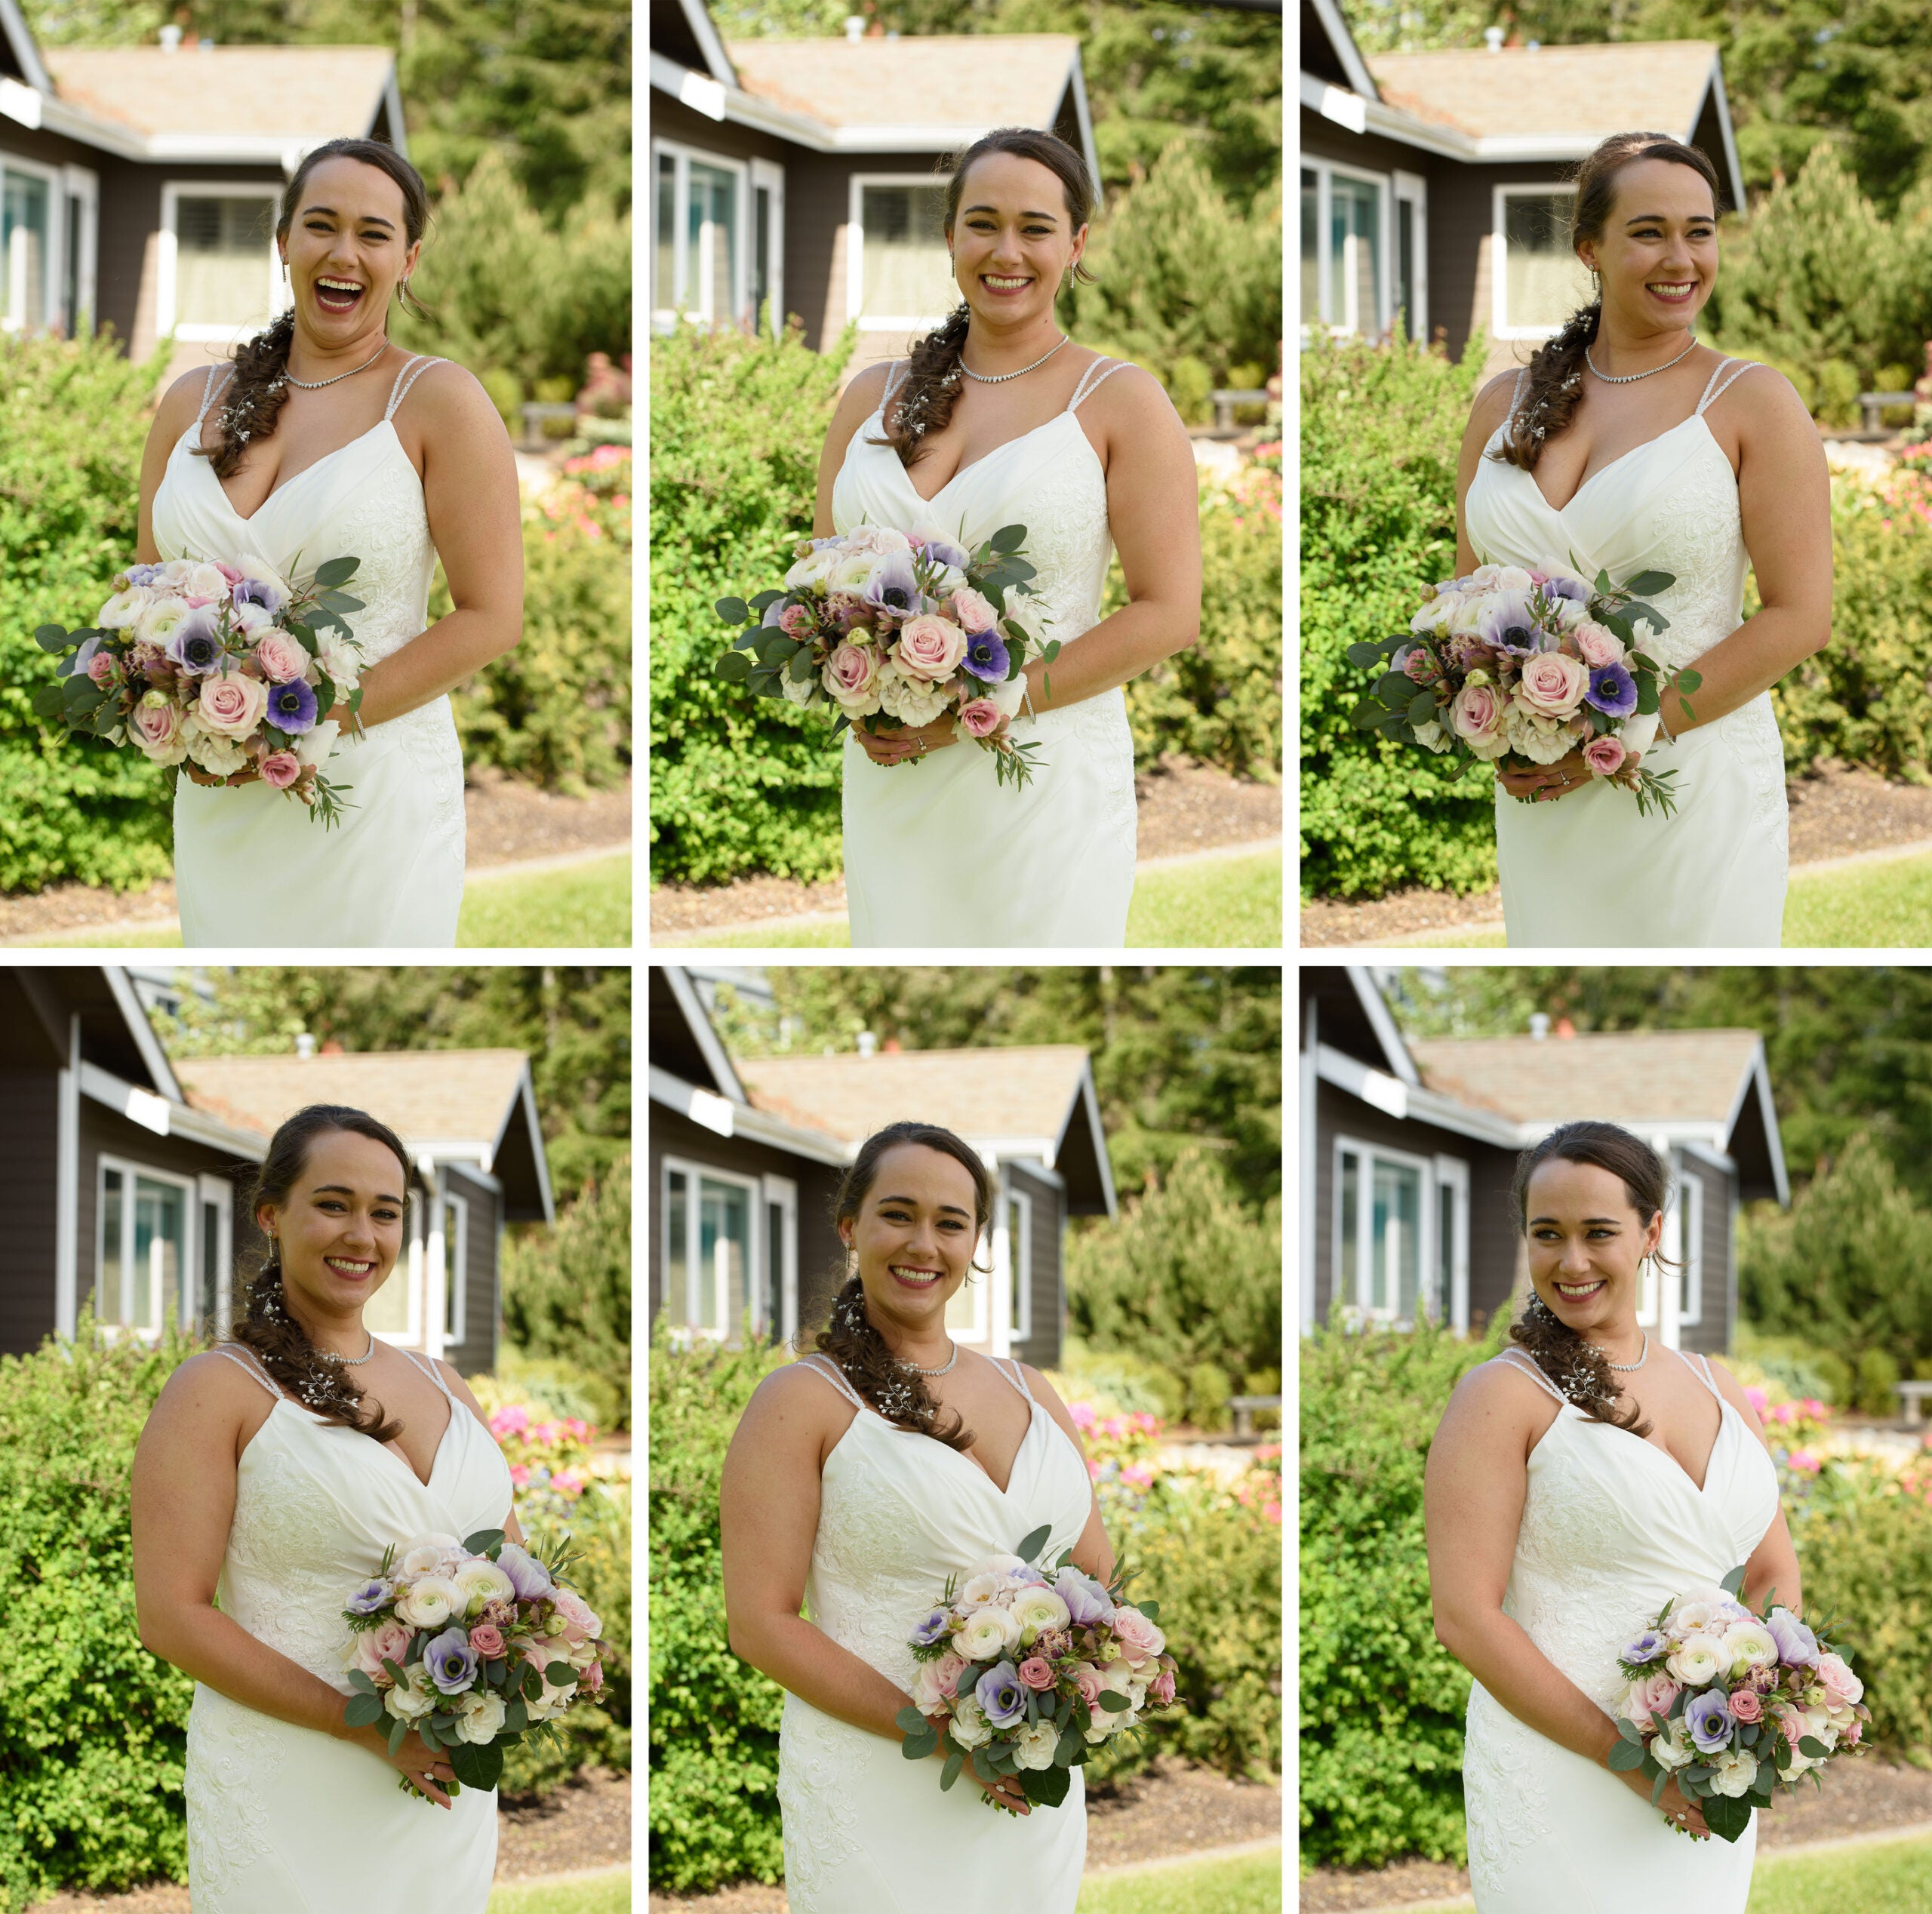
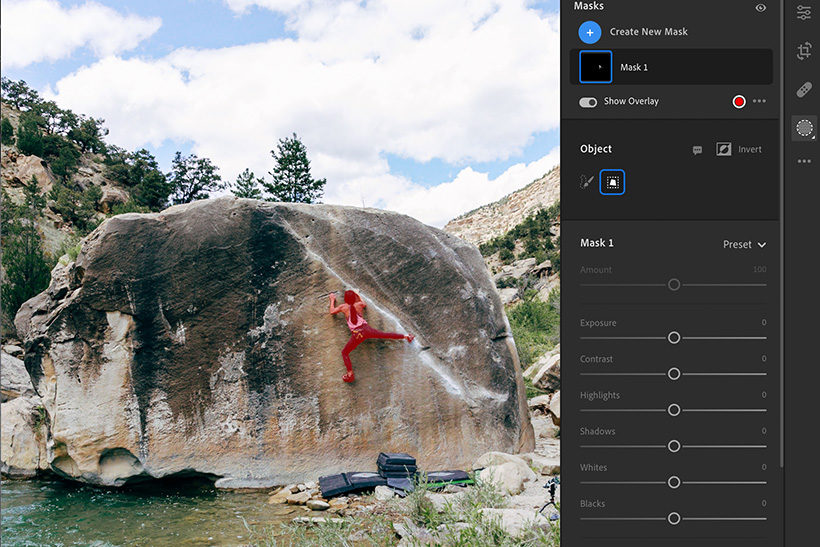
The bride is in shadow to avoid harsh highlights on a sunny day, so as a consequence I think she would benefit from additional exposure. Although she’s posing in one spot, she faces two different directions and naturally appears in slightly different positions within each shot. A single mask copied between the images wouldn’t be accurate. For the purposes of this article, I’m only focusing on the exposure on the bride, and not making other adjustments.
Adobe Photoshop
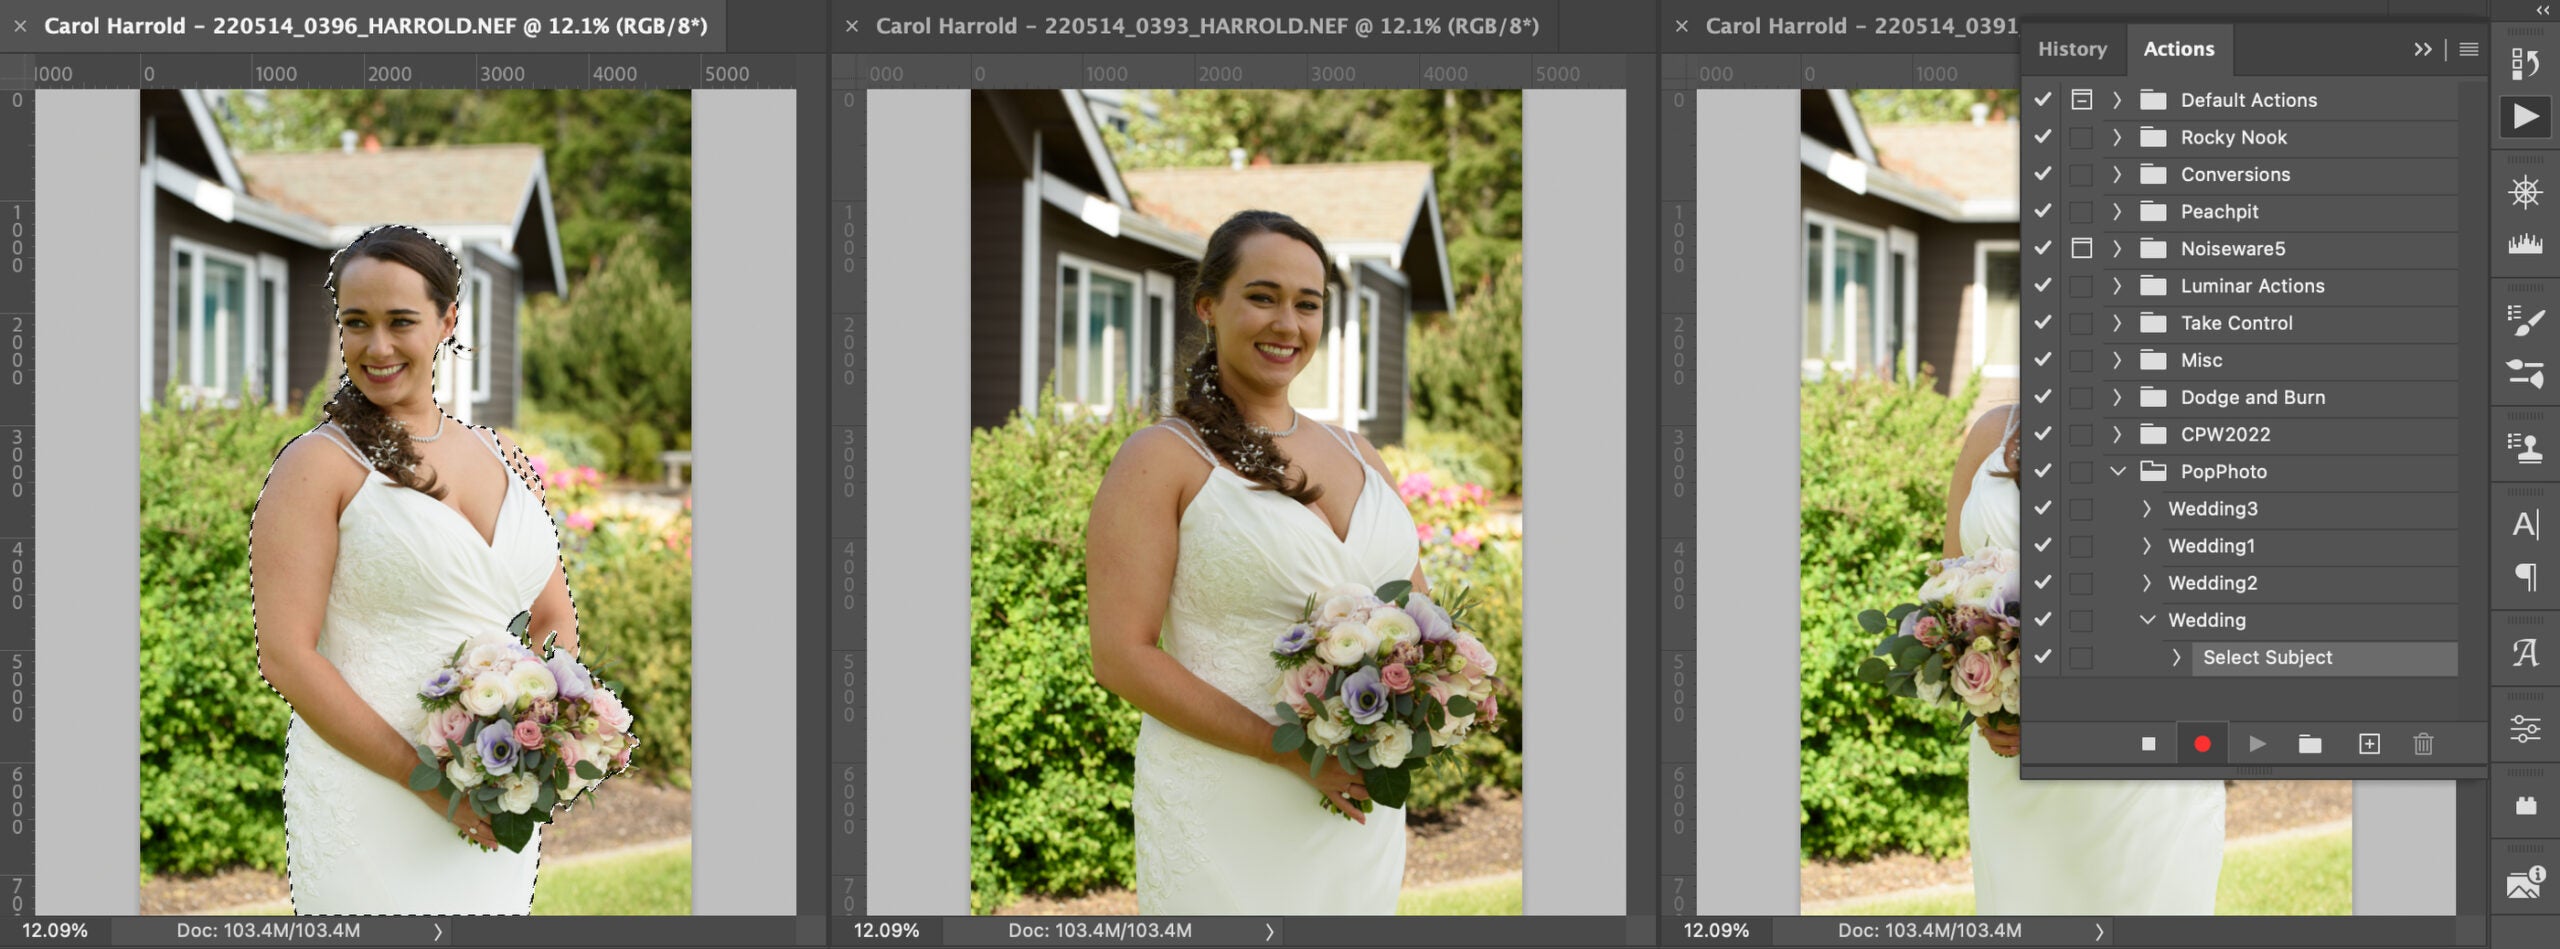
One of Photoshop’s superpowers is the Actions panel, which is where you can automate all sorts of things in the app. And for our purposes, that includes the ability to use the new Select Subject command in an automation.
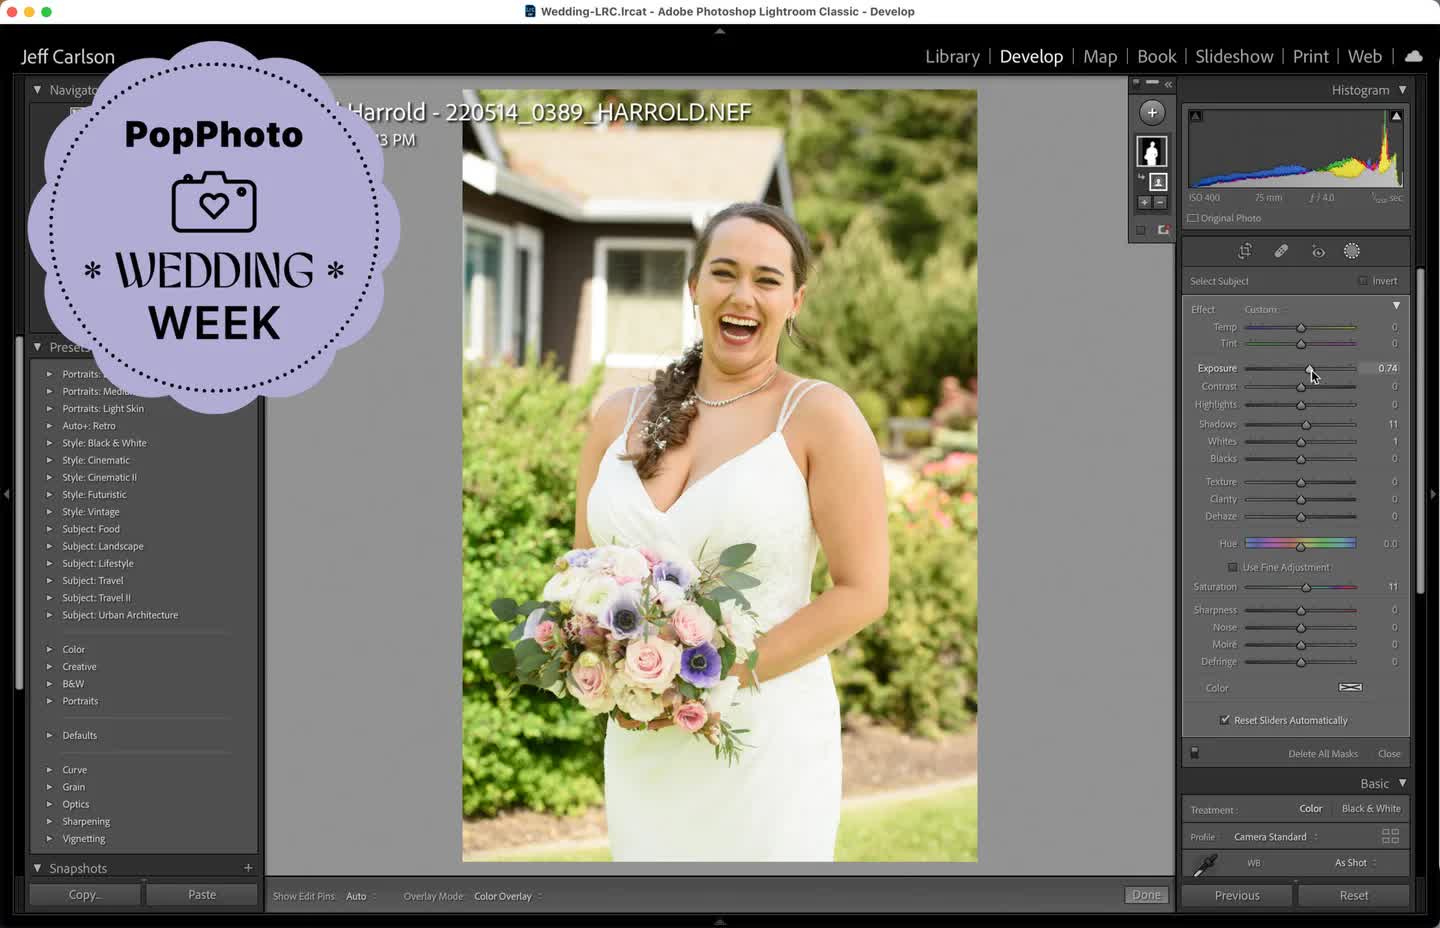
In this case, I’ve opened the original Raw files, which processes them through the Adobe Camera Raw module; I kept the settings there unchanged. Knowing that I want to apply the same settings to all of the files, I’ll open the Actions panel and click the [+] button to create a new action, name it, and start recording.
Next, I’ll choose Select > Subject, which selects the bride and adds that as a step in the action.
To adjust the exposure within the selection, I’ll create a new Curves adjustment layer. Doing so automatically makes a mask from the selection, and when I adjust the curve’s properties to lighten the bride, the effect applies only in that selection.
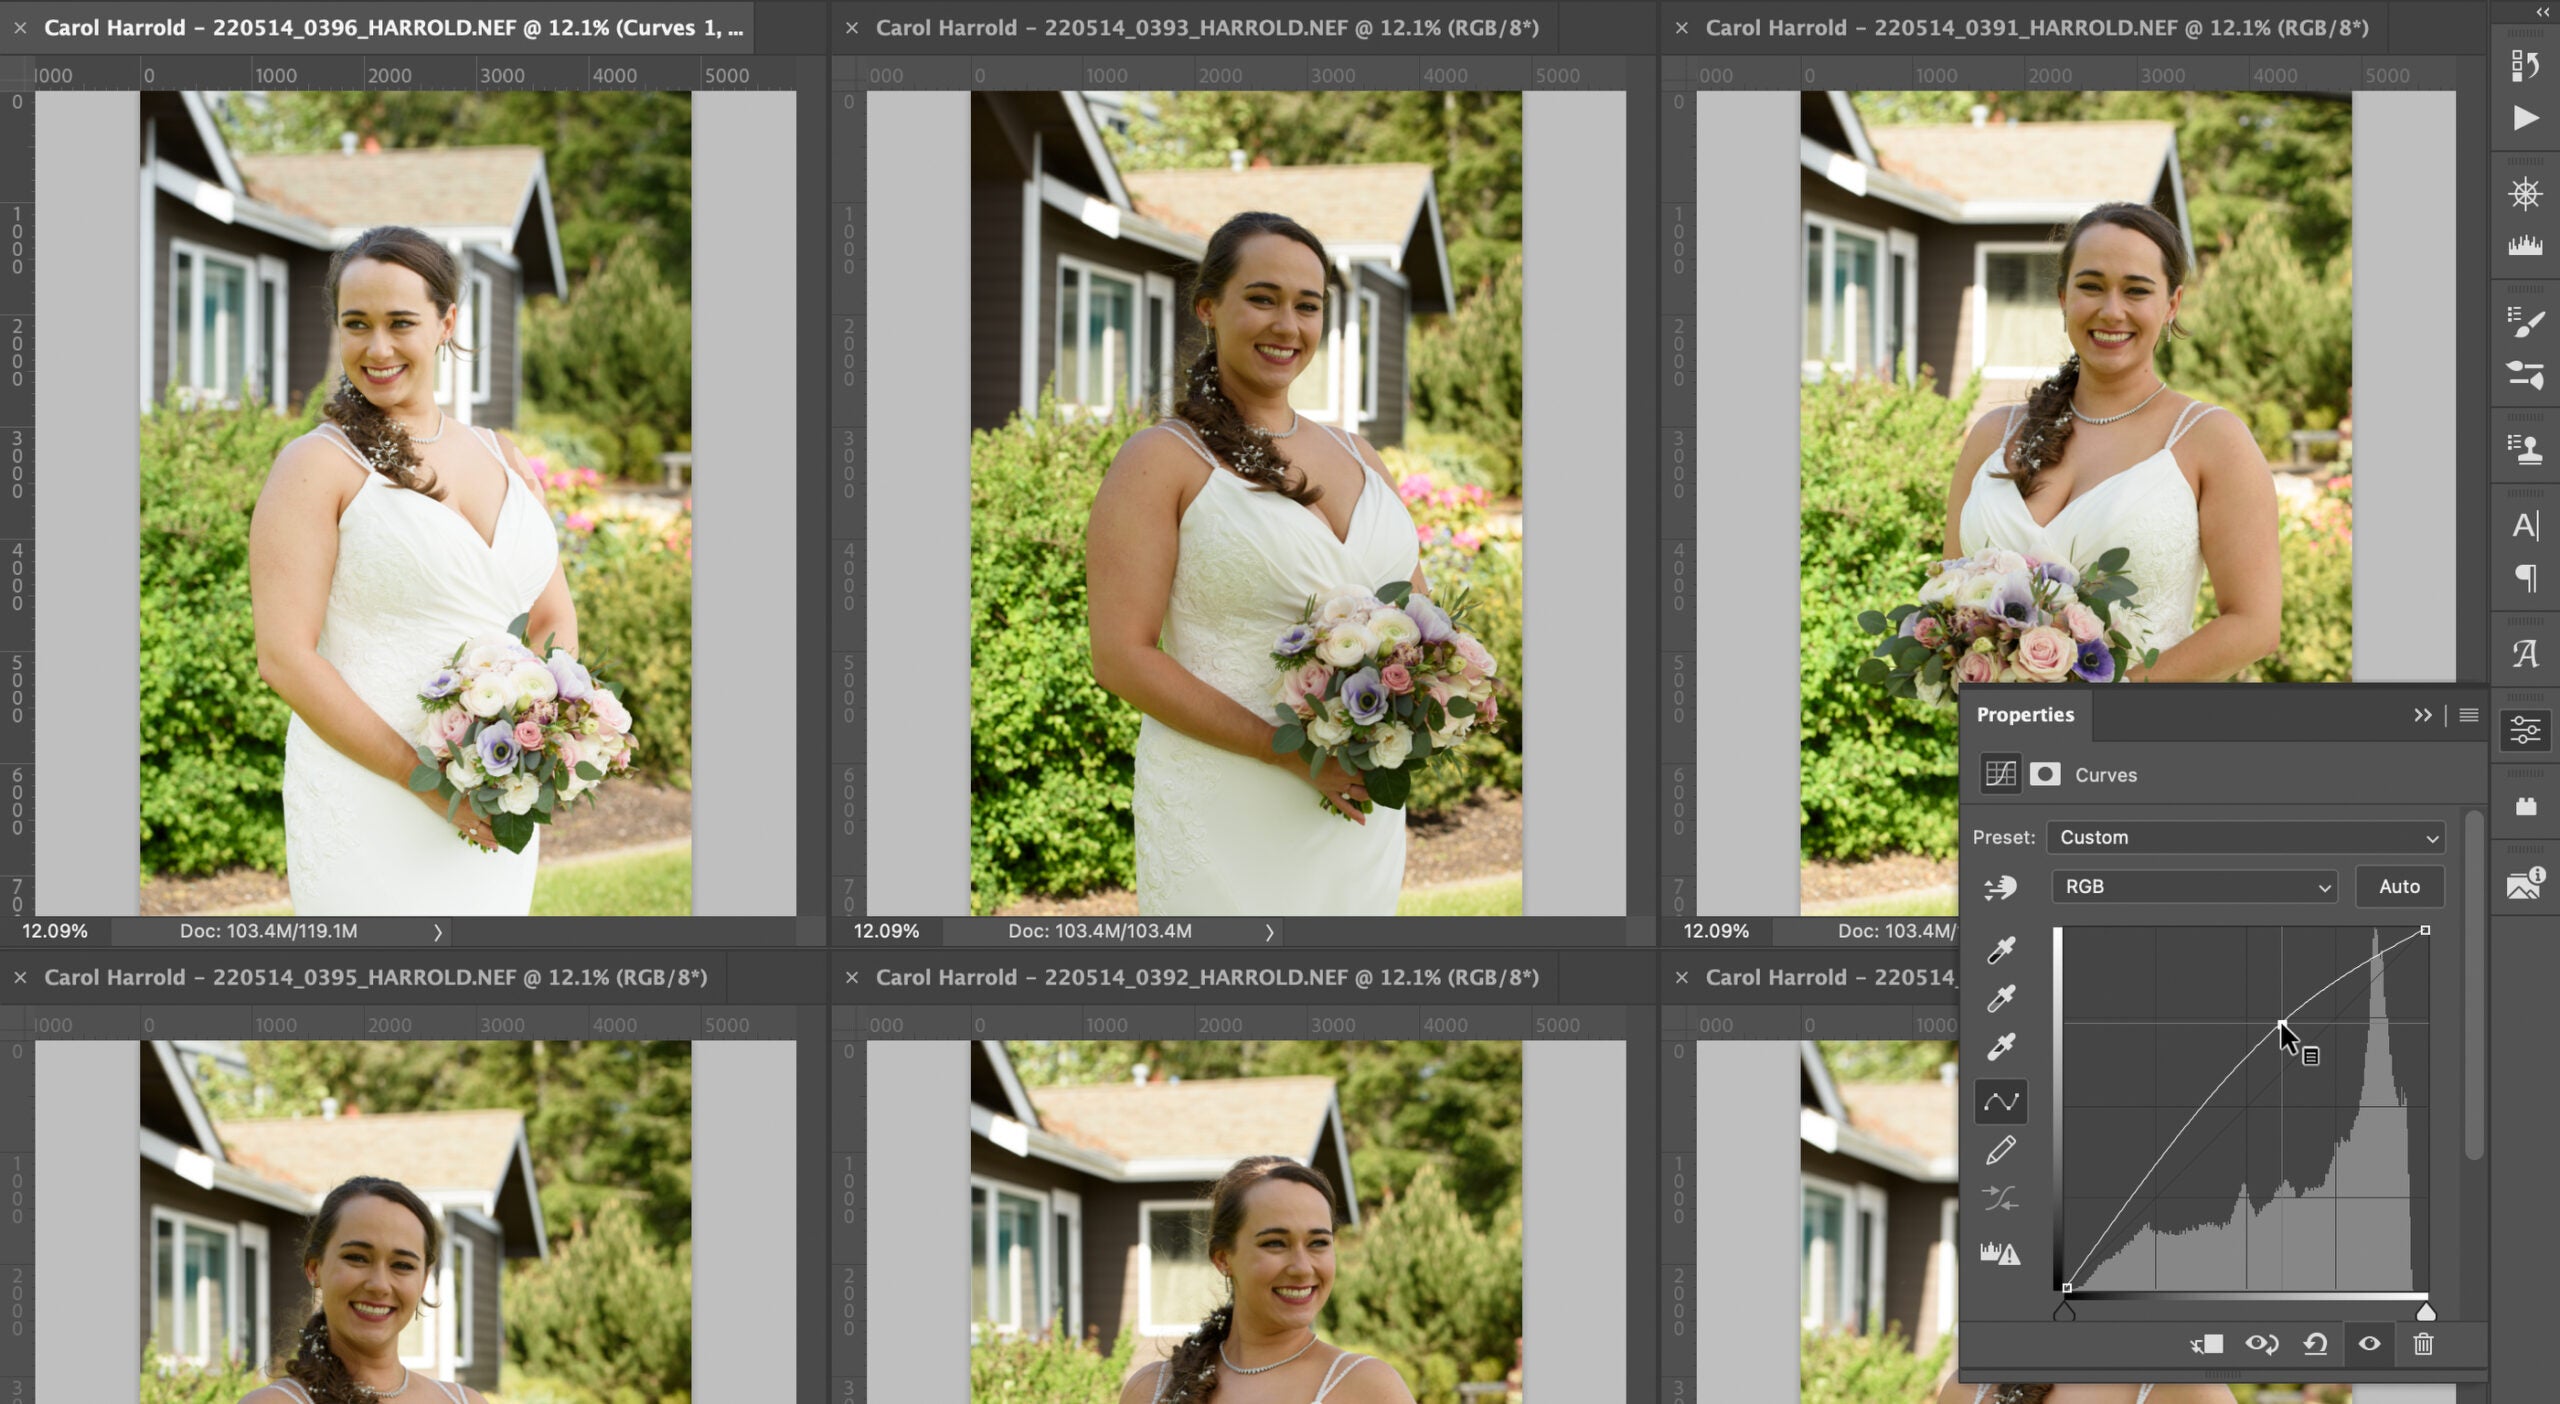
In the interests of keeping things simple for this example, I’ll stick to just that adjustment. In the Actions panel, I’ll click the Stop Recording button. Now I have an action that will select any subject in a photo and increase the exposure using the curve adjustment.
To apply the edits to the set of photos, I’ll choose File > Automate > Batch, and choose the recorded action to run. Since all the images are currently open in Photoshop, I’ll set the Source as Opened Files and the Destination as None, which runs the action on the files without saving them. I could just as easily point it at a folder on disk and create new edited versions. Read More...