5 Off-Camera Streak Photography Tips for Novices
-
 Loading...
 - Bogdan Sidorov
- 12 Jul 2024
- 43 Views
- 0 Like
- 0 Comment
Beginning with streak photography can rapidly feel overpowering. There's a lot to learn, and shooting with regular light alone can demonstrate sufficiently distressing, especially for fledglings. In point of fact, however, mastering the fundamentals of off-camera flash photography isn't all that hard to do, especially if you have some direction and equipment that is easy to use. The artistic liberty that streak photography bears would put forth it worth the attempt, regardless of whether it were troublesome.
Tip 1: Shoot with Manual Flash Power

Although using auto mode (also known as ETTL or TTL) with a flash appears to be simpler on the surface, editing the images becomes more challenging. The justification behind this is that auto mode can change the glimmer power for each picture you catch, and consistency rapidly vacates the premises. The nature of your outcomes will differ also. A few pictures could look perfect while others don't check full scale.
Assuming manual command over your glimmer power, then again, will assist you with dialing in the look you really want and give you reliable outcomes. The time you save in post alone makes it worth figuring out how to change your blaze power physically.
When setting the power of your flash, there are a few general "rules" that you should follow.
- One over One in the Sun

When shooting in direct sunlight, turn your flash on full power, also known as one over one. On the off chance that you're utilizing any modifiers to diffuse the light, you could require much more power than a solitary glimmer can deliver (contingent upon the blaze).
- Take a stab at Utilizing the Backwards of ISO
One more choice for deciding the best power setting for your glimmer depends on utilizing the backwards of our ISO setting. For your reference, here are a few examples:
i. ISO 200, which starts at 12 power
ii. ISO 400, which starts at 14 power
iii. ISO 1600, which starts at 1/16 power.
Tip 2: Get to Know the Backwards Square Regulation

Totally unrelated to Reverse of ISO, another way that we can decide how much glimmer power we want includes the converse square regulation. This "regulation" assists us with understanding how much light will arrive at our subjects, whether we're capturing individual subjects or huge gatherings.
Basically, the converse square regulation notes that the power of light tumbles off quickly as it moves it farther away from the subject.
To give a model, suppose that we've set our off-camera streak 3 feet from our subject. On the off chance that we, move the blaze back 3 extra feet without changing the glimmer power setting, just 25% of the light that arrived at the subject at 3 feet will in any case get to them.
Assuming we just multiplied our distance, for what reason did we lose 75% of our blaze power? Great inquiries.
The number related works like this:
- We multiplied the distance by twice (2x), moving it from 3 to 6 feet from our subject.
- The backwards of 2 is ½.
- At the point when we square the backwards number of 1/2 (increase the number on the lower part of the portion without anyone else - 2 x 2), we get ¼, or 25%.
Increasing our flash power or directing our light through a grid or snoot (such as the MagGrid 2 or MagSnoot 2) are two ways we can compensate for this loss of light. We can also make use of the built-in zoom feature of the flash unit.
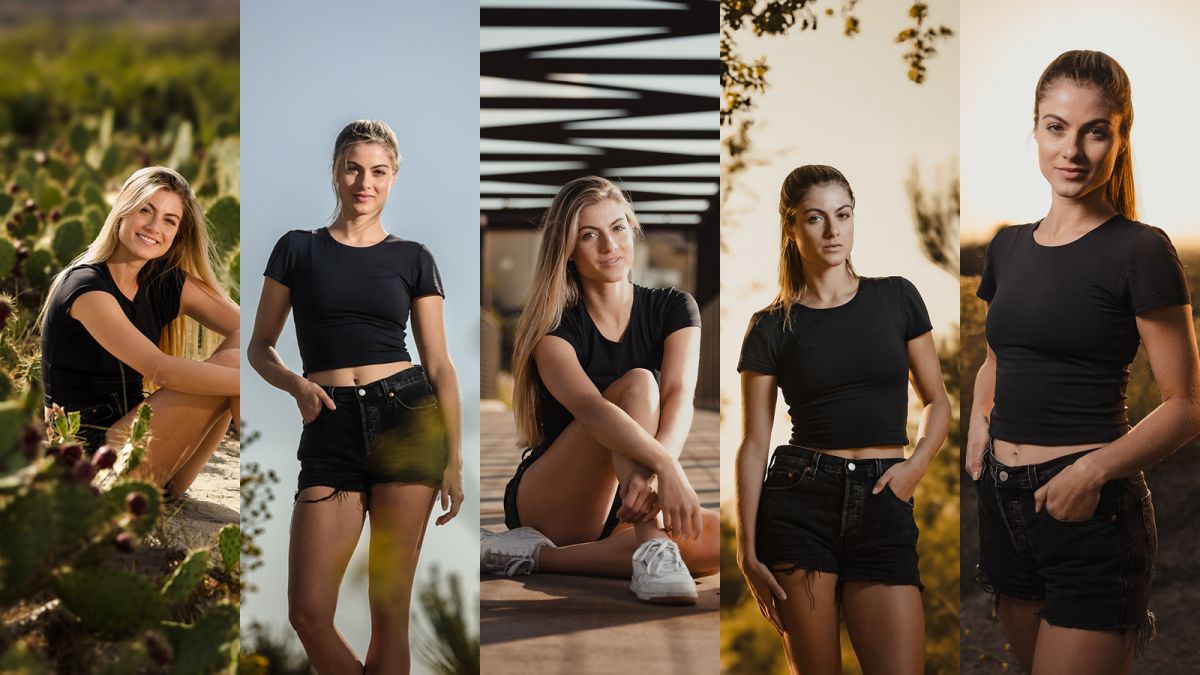
Tip 3: Recognize the Difference Between Soft and Hard Light
In flash photography, we can change the light to be either soft or hard, or somewhere in between. One sort isn't better compared to the next, yet you ought to know how to alter the light to get the look you need.
- Soft Light

To create a larger light source that is closer to your subject, you will probably want to use something like a softbox for soft light. As far as where to put the light, drawing it nearer to your subject will make the light source greater and the light quality milder.
Keeping the flash one to two times as far away from your subject as the size of the box is a helpful tip for positioning the light. As such, on the off chance that you're utilizing a MagBox Expert 42" Octa, place it somewhere close to 42" - 84" (3-7 feet) from your subject. When using a smaller box like the MagBox Pro 24" Octa, try to position the flash between 24" and 48" away from your subject. Once more, these are suggested distances for getting milder light.
- Hard Light

For hard light, then again, place your lights farther back or utilize other more modest modifiers (MagSphere, MagBounce, or MagGrid).
To effectively control your light, make sure to modify your off-camera flash in accordance with your decision.

Tip 4: Add Color to Your Flashes

Adding color to your flash is a quick and simple way to significantly broaden your creative options. Simply attach a MagMod Pro Gel or one of your other color gels to your flash. At the point when you change your white equilibrium in post for complexions, the variety present in the scene will move, at times emphatically. We've expounded on this cycle in additional detail in our natural manual for gels and imaginative variety impacts. In the article and video, we show you how to use MagGels to create creative color effects on your photos to change the color and mood. We also talk about the various gels you can use to get the color you want.
Tip 5: Use Multi-Light Arrangements
At the point when you like you're prepared, we suggest moving on from one off-camera glimmer to at least two. Shooting with multi-light arrangements is both tomfoolery and innovatively fulfilling.
For a two-light arrangement model, place your primary or key light where you typically would. We went with a delicate box out of the way before our subject. Then, place the second light somewhat behind and out of the way of the subject to add a "kicker" light, which ought to assist with cutting your subject out of the foundation with a pleasant edge light.