How to Use a Backlight to Create a Wow Effect in Your Food Photos
-
 Loading...
 - Amon Mostafa
- 22 Jun 2022
- 179 Views
- 0 Like
- 0 Comment
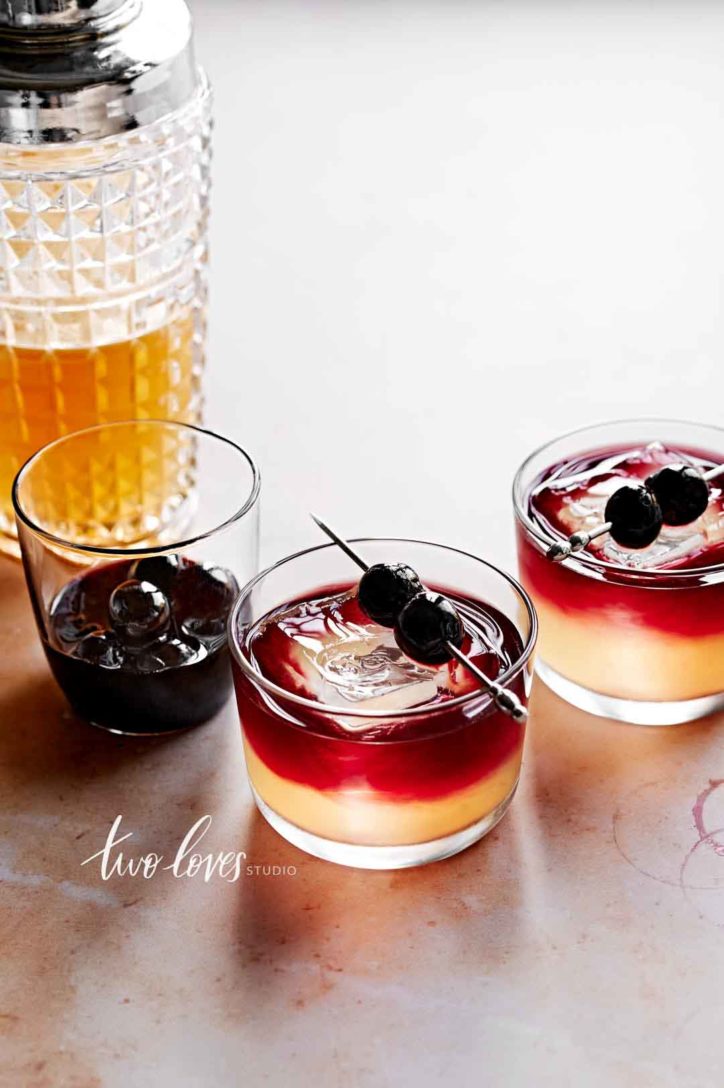
Backlight is a great way to get a ‘wow effect’ in your food photos because there is something magical about it. Great light is the key to great photos. It’s one of the fundamentals of food photography.
This post shows you how to use the backlight properly in your food photography.
What is Backlight?
Backlight is when light shines from behind the subject of an image from the camera’s perspective. It’s most magical when your subject is shiny, transparent, or translucent.
It’s most often found 45-degree angles or lower. You won’t find backlight in overhead images unless the table itself is glowing!
Set up your Backlight
Only a single window or light source is required. Natural light is a great way to get started.
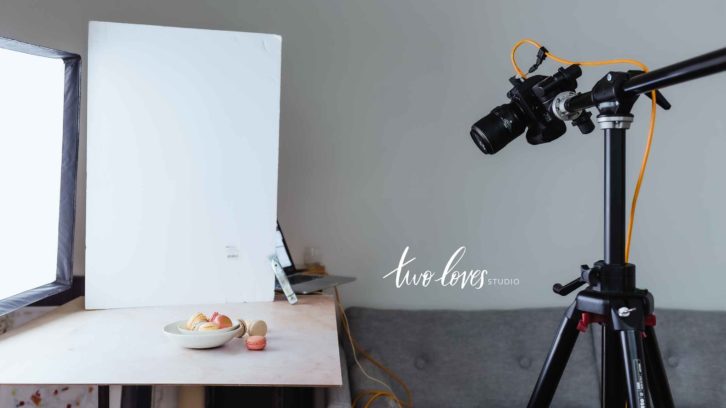
The light must be falling from behind the subject, almost directly across from the camera. So put your subject in between your light source and the camera. If you imagine the light as a clock face, it should appear between 11:00 and 1:00 on the clock when you are behind the camera.
How the backlight renders will depend on the quantity of light. If using natural light, pay attention to how the size, shape, materials, and details of your window impact the look. You’ll also get different results on different days and times of the day due to how the light changes outside the window.
You can move your background (or surface) towards and away from the window to get different shadows, light falloff, and wrap. So experiment with it and see what happens when you move it around.
Exposing for Backlit scenes
Backlighting can be a complex technique to master in photography since you need to know how to operate your camera and set a good exposure. If you use automatic settings, you’ll likely have suboptimal exposure.
That’s because the light can confuse the camera’s light meter into thinking it is a bright scene. If the camera exposes the bright backlight, the food will be dark, grainy, or lacking in detail. So Step 1 is to pick the right metering mode.
Step 2 is that you have to get out of automatic mode. Start with either Aperture or Shutter speed priority. Note, that these modes are still partially automatic, so you’ll have to change your exposure compensation. With backlit scenes, you’ll often have to increase (+) your exposure compensation so that your subject is exposed well enough.
For the most control, switch your camera to manual mode. This will help even more if you’re adding or taking away objects in the frame. That’s because aperture and shutter speed priority modes will still be automatically calculating your exposure based on what the meter is reading and your exposure compensation.
With manual mode, you are in control of all of the settings. So adding or removing objects won’t change the exposure. This will allow you to control your histogram and make sure that you’re not losing any details in the highlights or the shadows.
Start with a Dark Room
Your backlight will not work if there are other sources of light that are brighter. Also, since house lights are a colour temperature to daylight, you might have trouble getting the perfect white balance when you edit.
So start in a dark room with a single light source and see how that looks. If your subject is too dark on the camera side (front), then you can either bounce in some light or use a scrim. Or both!
Bounce in some Light
You’ll get some incredibly dazzling bright areas and some gloomy spots even if you overexpose. That’s when a bounce comes in handy. You can experiment here to see what appeals to you the most. In comparison to backlight or sidelight, I’ve discovered that a person can be more proactive with the concept of light bouncing in the backlight.
Use a Scrim
If you find that you’re pushing the edges of your histogram, a scrim will help remove the extremes brightness and darkness so that you have the best data to edit your food photos. Using it will help prevent clipping the highlights or the shadows. Both Lightroom and Capture One have clipping warnings that you can use when tethering.
It can also help If you find that the reflections being created are distracting, or that you are seeing something outside that you don’t want to see you’ll need a scrim.
A scrim is any fabric that appears opaque until it is lit from behind. So you can use a thin white cloth in the window to soften the sunlight. Even on gloomy days and at the time of peak winters, you can do this. It will diffuse the light more and lighten your shadows.
You can use a scrim if you’re using artificial light as well. If you have a hard source it will help to soften and diffuse the light.
Final Editing
Once you’ve captured your backlit photo, it’s time to edit it. This can allow you to take a regular looking photo and make it magical. Read More...