Bracketing in Photography: The Ultimate Guide
-
 Loading...
 - Eric Robert
- 02 Feb 2022
- 517 Views
- 0 Like
- 0 Comment
In this article, I explain everything you need to know about bracketing in photography, from the absolute basics (e.g., how to bracket in-camera) to more advanced tips and techniques (e.g., how you can use bracketing to create pro-level landscape and cityscape shots). I also include plenty of practical advice along the way, so you know exactly when and how to apply bracketing for the best results.
Bottom line: If you’ve heard about bracketing but aren’t sure what it does, or you’re an experienced photographer simply looking for high-level guidance, you’ve come to the right place.
Let’s get started.
What is bracketing?
Bracketing is a camera technique where you capture several different exposures of the same scene. In other words, you capture a standard image (below, top), a darker/underexposed version (below, bottom left), and a brighter/overexposed version (below, bottom right):

Each composition is identical, yet the exposure level varies from shot to shot. Generally, this is done on a tripod to prevent camera movement between images, but there are also photographers who bracket handheld (and I discuss this option below!).
Note that bracketing most commonly occurs in groups of three. However, this isn’t a requirement; some situations need only two images, while others call for five images, seven images, nine images, or even more. It depends on your exposure skills and the scene itself, as I discuss in the next section:
Why is bracketing useful?
At its simplest, bracketing increases your odds of nailing a difficult exposure.
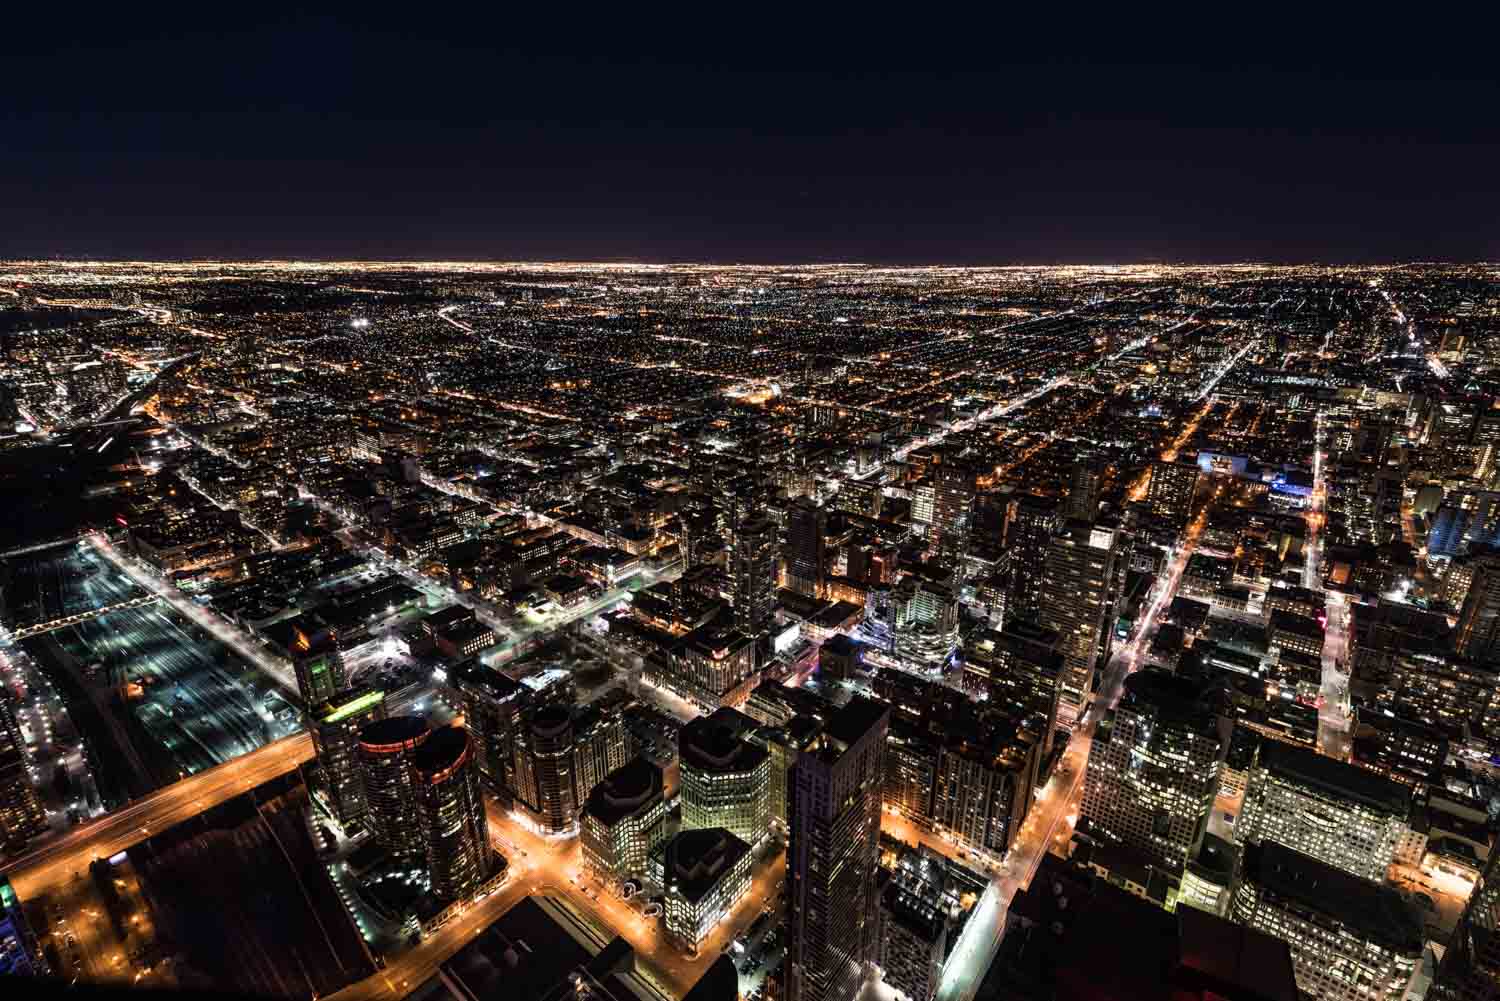
You see, every modern camera is equipped with a meter, which analyzes a scene and determines the proper exposure settings for beautifully rendered detail. But while camera meters are powerful, they often get the exposure wrong. For instance, cameras characteristically overexpose (over-brighten) dark scenes (e.g., a nighttime image of a city skyline) and characteristically underexpose (over-darken) bright scenes (e.g., a stand of white aspen trees in snow).

When this happens, you can always make adjustments using Manual mode or exposure compensation – but unless you have lots of experience and an excellent mental exposure system, it’s tough to know exactly how much to modify your camera settings for a good result.
Enter bracketing, where you take a series of differently exposed images. Sure, the first shot might be poorly exposed, but if you take three (or five, or seven) images, one is bound to look good. With a fastidious eye and a careful bracketing process, you can practically guarantee a nice exposure.
Bracketing in this way – that is, as insurance – is especially helpful when facing very bright or very dark scenes, as well as when photographing scenes with lots of tonal variation. Beginners may choose to bracket even in more standard exposure scenarios, just to be safe.
But there’s a second reason to bracket your images, one that’s very popular among landscape and cityscape photographers in particular:
Bracketing lets you capture high dynamic range (HDR) photos.
Bracketing and high dynamic range photography
The dynamic range of a scene refers to the difference between its lightest lights and its darkest darks.
A gray wall has a very low dynamic range, as it’s full of midtones and little else. But a sunset – with a bright sky and a dark foreground – has a huge dynamic range, as does a white cat on a black background, a mound of snow against a black tree, and so on.
And camera sensors struggle to capture the entire tonal range of such scenes. When photographing a sunset, if you set your exposure for the midtones, you’ll end up with detailless foreground shadows and detailless sky highlights. But if you expose for the shadows, you’ll lose detail in the highlights, and if you expose for the highlights, you’ll lose detail in the shadows.

See the problem? Scenes that feature bright areas and dark areas can’t be easily rendered by a camera sensor, no matter the exposure value. Fortunately, there’s an easy solution:
Instead of capturing one image of the scene, you bracket.
And then you blend all of your bracketed images together in a post-processing program. That way, you can use the detailed highlights from one image, the detailed midtones from another image, and the detailed shadows from a third image. It doesn’t matter if each individual shot is missing details at its extremes, because all the detail is present, just spread across the three images.
This may sound difficult, but it’s really not. The bracketing process is the same as I described in the previous sections. And post-processing programs often include an auto-merge feature, where you select several images and they quickly combine them together for the best (HDR!) result.
One final note: While many scenes only require three bracketed shots – a standard shot, a light shot, and a dark shot – in extreme situations, you may want to use five, seven, or nine images instead. That’s the hardest part about bracketing: deciding exactly how many images to capture!
Bracketing and camera settings
Image exposure is determined by three variables: aperture, shutter speed, and ISO.
Adjust any of these variables, and you’ll get an incrementally lighter or darker shot. But each variable will also affect your photo in other ways:
1. The aperture will affect the amount of the scene that is in focus, also known as the depth of field
2. The shutter speed will affect the sharpness of your image, especially when photographing moving subjects
3. The ISO will affect the noisiness, sometimes referred to as the graininess, of your image
So when bracketing, which variable should you target for adjustment?
In general, you should bracket using the shutter speed. If your subject is stationary and you’re working with a tripod, you shouldn’t have any issues increasing and decreasing your shutter speed, and you’ll get the desired underexposure/overexposure effect.
However, if you need to keep your shutter speed at a particular value, you can bracket using ISO. Just know that the higher you boost your ISO, the worse your images will look, so be very careful before pushing your ISO to significant heights. Read More…