How to Remove a Background in Photoshop
-
 Loading...
 - Nolan Doyle
- 01 Jun 2022
- 284 Views
- 0 Like
- 0 Comment
Using Photoshop to remove the background in an image so that you can replace it is one of the most frequent things for which it was used, and might still be. The actual placing of a new image for a background is relatively easy. The heavy lifting comes from making a good selection of your subject as this will be used to remove the unwanted background for replacement.
In this article, we will show you how you can use Photoshop to remove a background from a photo. The majority of this article will focus on Photoshop’s selection tools and techniques that can be used in order to perform a background replacement along with some tips on how to adjust the final image to make it look realistic.
Note: It may be helpful for you to have Photoshop open while reading this article so you can see the tools and options in more detail than might be easily seen in the screenshots.
Tools I Don’t Recommend
Step 1. Tools for Selecting the Background
Making an accurate selection is key to separating the subject from the background in order to replace that background. As is often the case with Photoshop, certain tools might work better than others depending on the content of the image. In fact, it often makes sense to use more than one of the selection tools to complete and refine a selection for background replacement.
Since version 1.0 of Photoshop, there have been multiple selection tools available such as the Lasso and Magic Wand tools. Fast forward to version 23 released in late 2021 and we have several more tools which include the new Select Subject function which can do an amazing job and picking the subject out of an image.
I say “work smarter, not harder” whenever possible so I encourage using a combination of the smart tools like Select Subject or the Quick Selection tool to create an initial selection and then use other tools as needed to refine the selection. I’m going to start with a high-level look at
the selection tools I use in Photoshop and from there we’ll look at how to use them together.
Select Subject
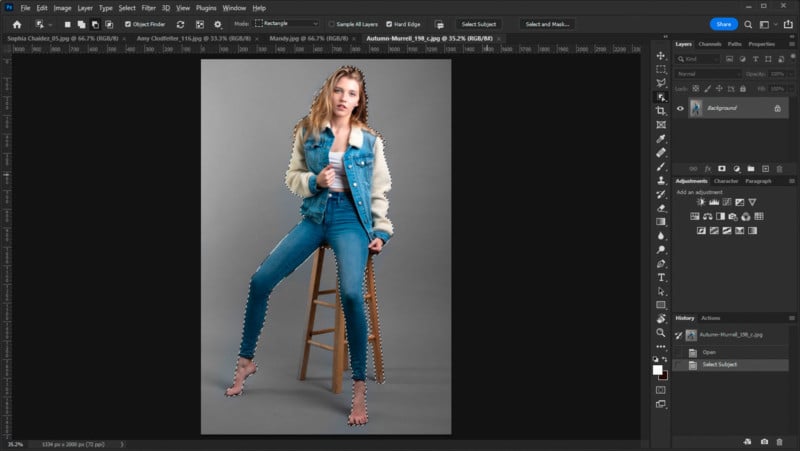
The Select Subject function, as you might have guessed, does its best to determine what the image subject is and will then create a selection around the edges of that subject. This is one of my favorite ways to start a selection as it usually does a good job of choosing the right subject.
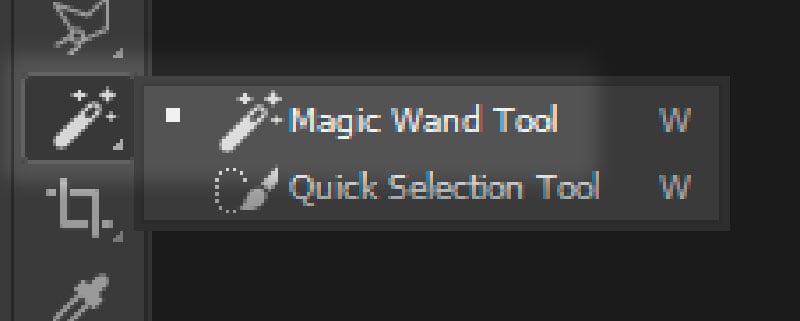
To use Select Subject, select either the Quick Selection or Magic Wand tool in your Tools panel and then click Select Subject in the options bar.
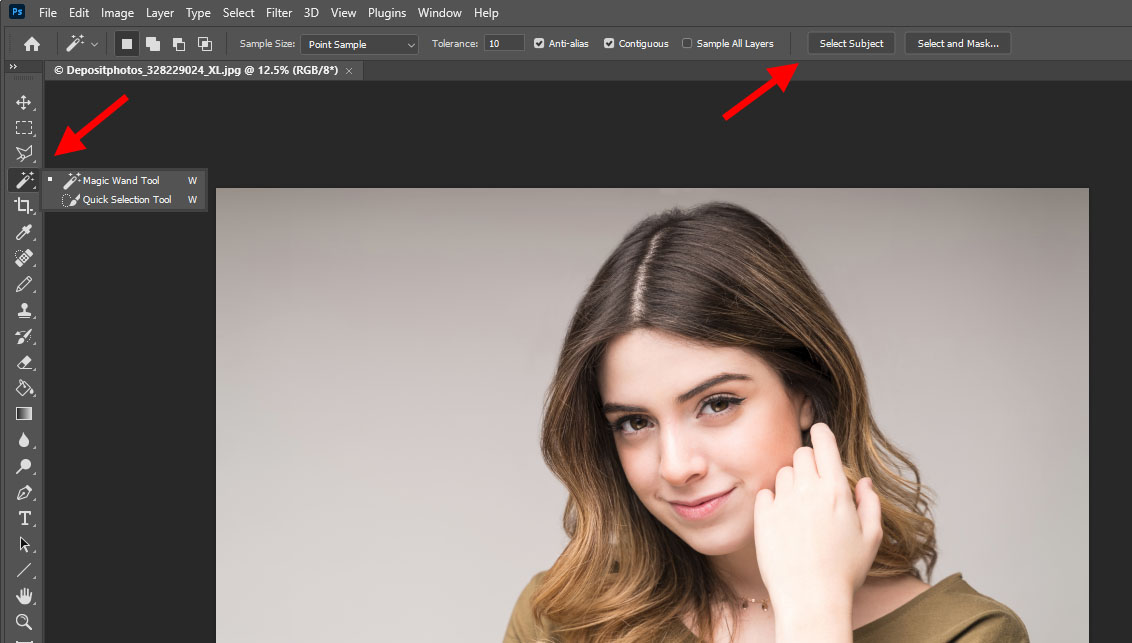
Alternatively, you can also go directly through the menu bar via Select>Subject.
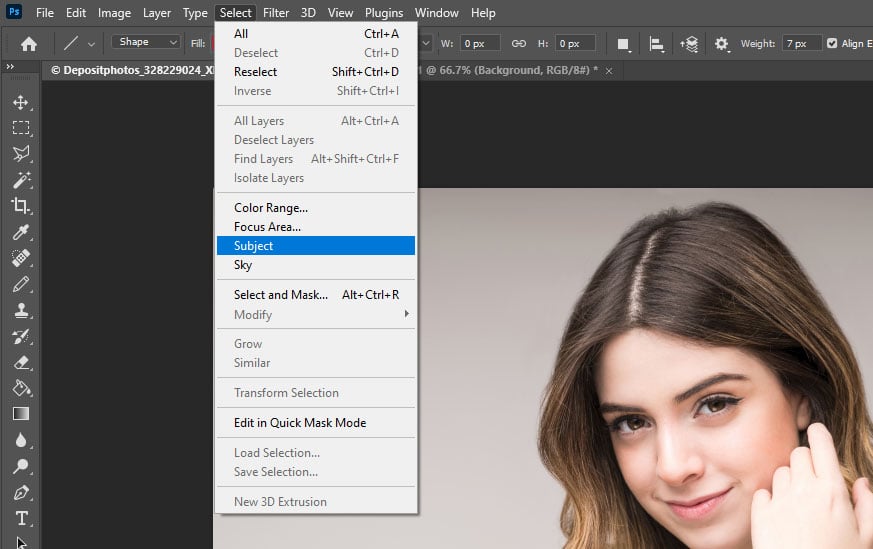
Figure 1 shows how Select Subject has done a good job of selecting Autumn from the background but it also included one of the stool legs that will need to be cut from the selection.
Magic Wand
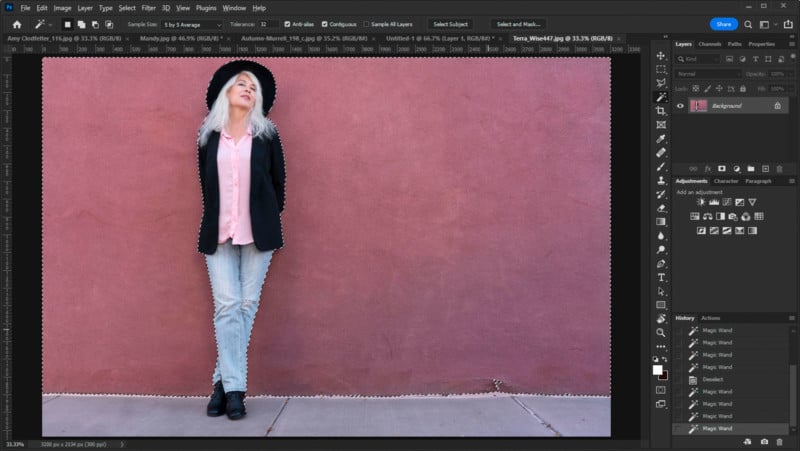
The Magic Wand selects areas of color similar to the spot “clicked” in the image. There are multiple options in this tool including how small or large of a color sample to take, how much tolerance, or similarity there needs to be in the colors in order to be added to the selection, and whether or not to select a contiguous area or any areas of similar color in the image.
The pink wall in Figure 2 was selected using three clicks of the Magic Wand tool. By holding the Shift key while performing additional clicks in the areas similar but not yet selected in the first click, you can add more similar areas.
Quick Select
Using Quick Select has been around for a few years now and as opposed to a fully automated selection, one “guides” the selection by moving the cursor near the edge of the area you want to select. The tool can be adjusted like the Brush tool in that it can be resized and its edge can be softened/hardened. It can also be used to select on a specific layer or all layers adding to its versatility.
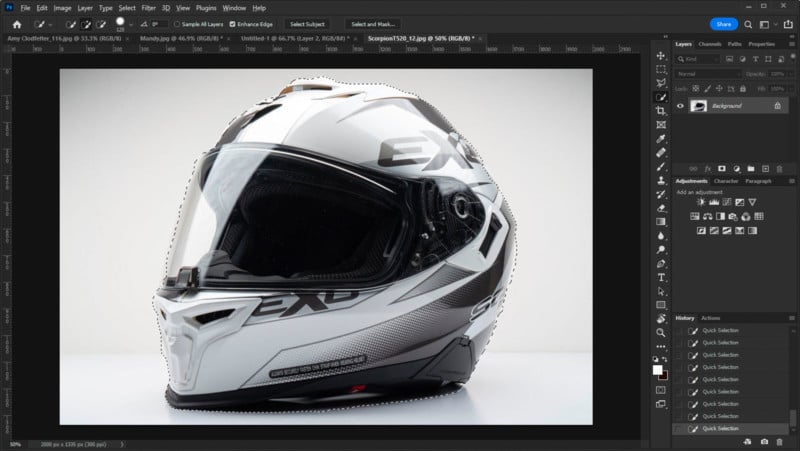
Figure 3 was tricky as the gray tones of the helmet wanted to “bleed” into the background. Using the Quick Select tool this selection took about a full minute. This required brushing around the edges and then using the Alt key in Windows (or Option on Mac) to subtract the selection from areas of “bleed”.
Object Selection
Object Selection appears to be built on the same AI technology as the Select Subject function. You can access Object Selection from the main application toolbar or from the toolbar in the Select And Mask workspace. If you don’t see Object Selection in your main toolbar, go to Edit>Toolbar and make sure you have the tool added.
By moving the cursor onto different items in an image, the Object Selection tool will “shade” what it believes to be the entirety of the object. Clicking at that point will create a selection based on that shaded object and this works even if the object in question is visually divided by something in the image.
In Figure 4, Amy is standing in front of the Corvette and is holding her jacket in her left hand. Using the Object select tool, I can choose to make a selection around her, the car, or even the jacket. Read More...